Introduction
Hyperbase is an open source Backend-as-a-Service (BaaS) that strives to be performant and reliable. It provides a way for developers to handle common backend functionalities without having to build and maintain them from scratch. This can save time and resources, allowing developers to focus on the core features of their application.
Key features
-
Fast and reliable backend to serve hundreds of thousands requests per second.
-
Secure data management with strict access control using auth token.
-
Implementing schema-based database, always check the data type before inserting it into the database to prevent unexpected bugs.
-
Realtime subscriptions through WebSocket to notify any eligible connected devices for each data changes.
-
Simple but expressive querying using REST API.
-
Supports data insertion over an MQTT connection, allowing microcontrollers to integrate easily.
-
Supports file storage in any format.
-
Delete data or files after specified time-to-live (TTL), if set.
-
Works with various SQL database backends, you can choose between PostgreSQL, MySQL, SQLite, or any other database compatible with any of the three.
-
Synchronize data to other Hyperbase instances using the gossip protocol (currently only available if using PostgreSQL, MySQL, or SQLite)
Quick Start (using Hyperbase UI)
This section will show how to configure a project in Hyperbase using Hyperbase UI.
If you open the UI for the first time, you will be asked about the base url of Hyperbase server.
An example value is https://api.hyperbase.in
Sign Up
You need to create an admin account before using Hyperbase. Follow the steps bellow to create the account.
-
Open Hyperbase UI. On the sign in page, click Register. Make sure to enable
admin_registrationin the configuration file. -
Fill up the email and password, then click Sign Up.
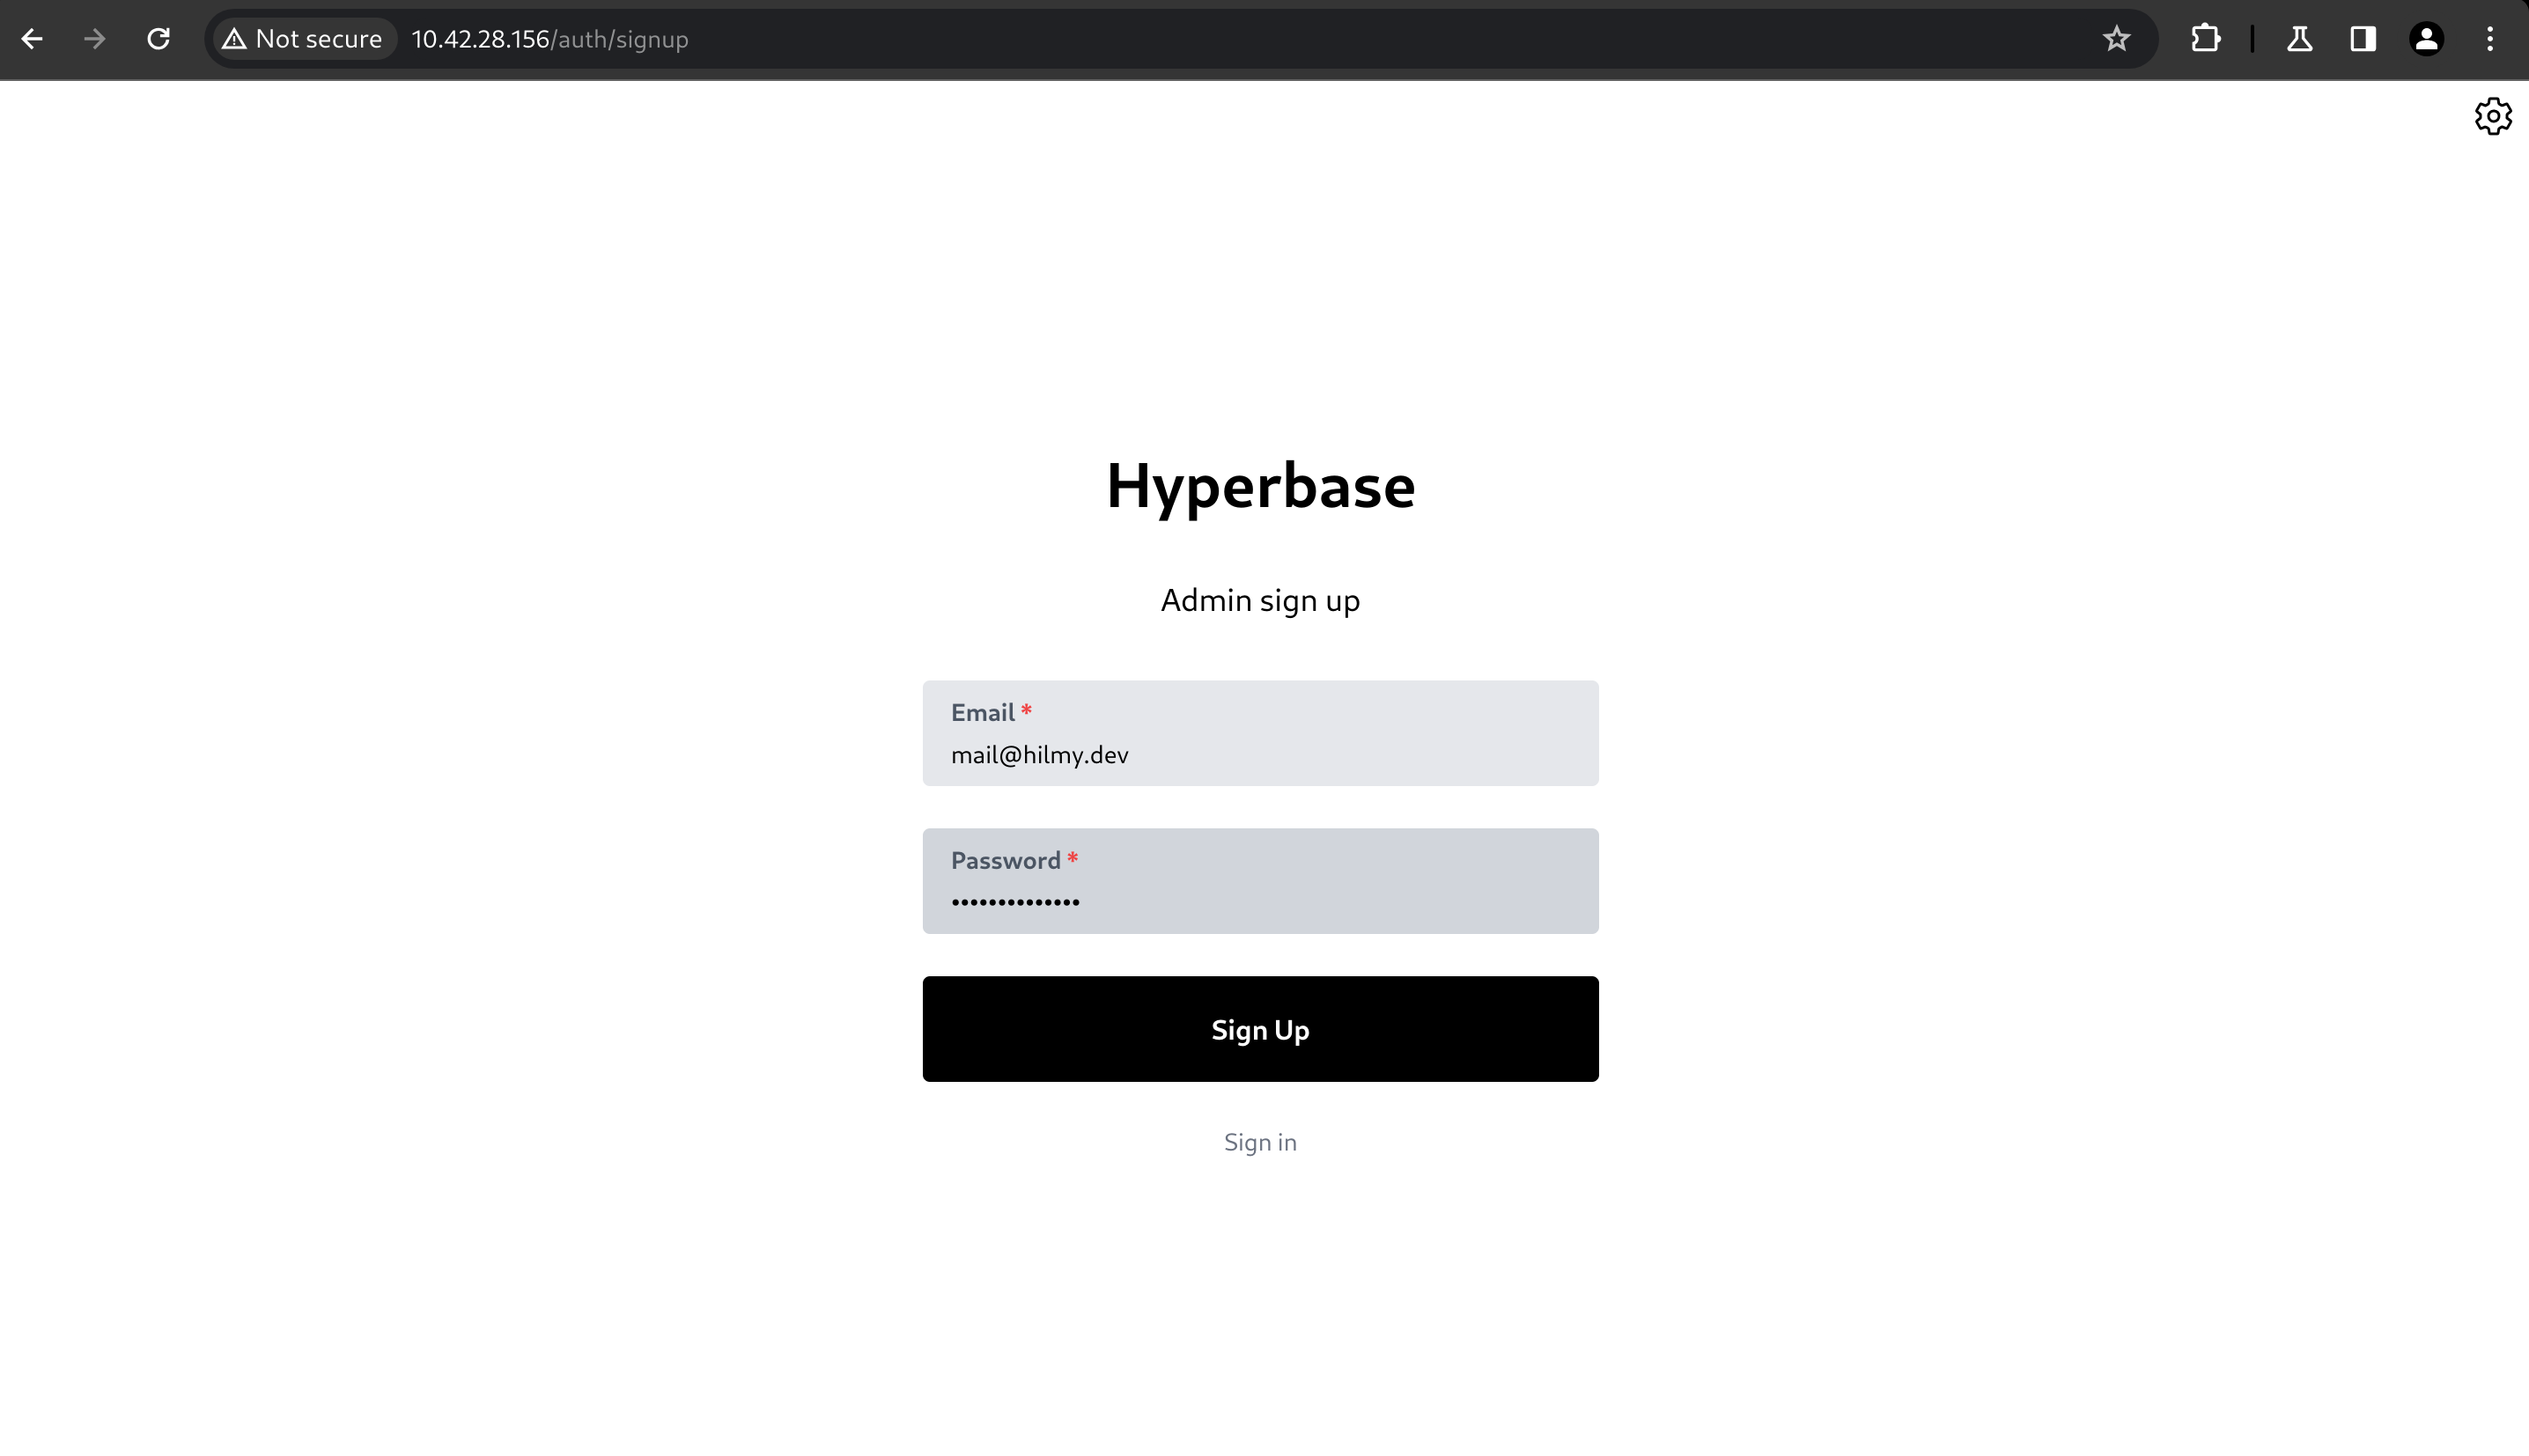
-
Check your email inbox. Copy the verification code, then click Verify Sign Up.
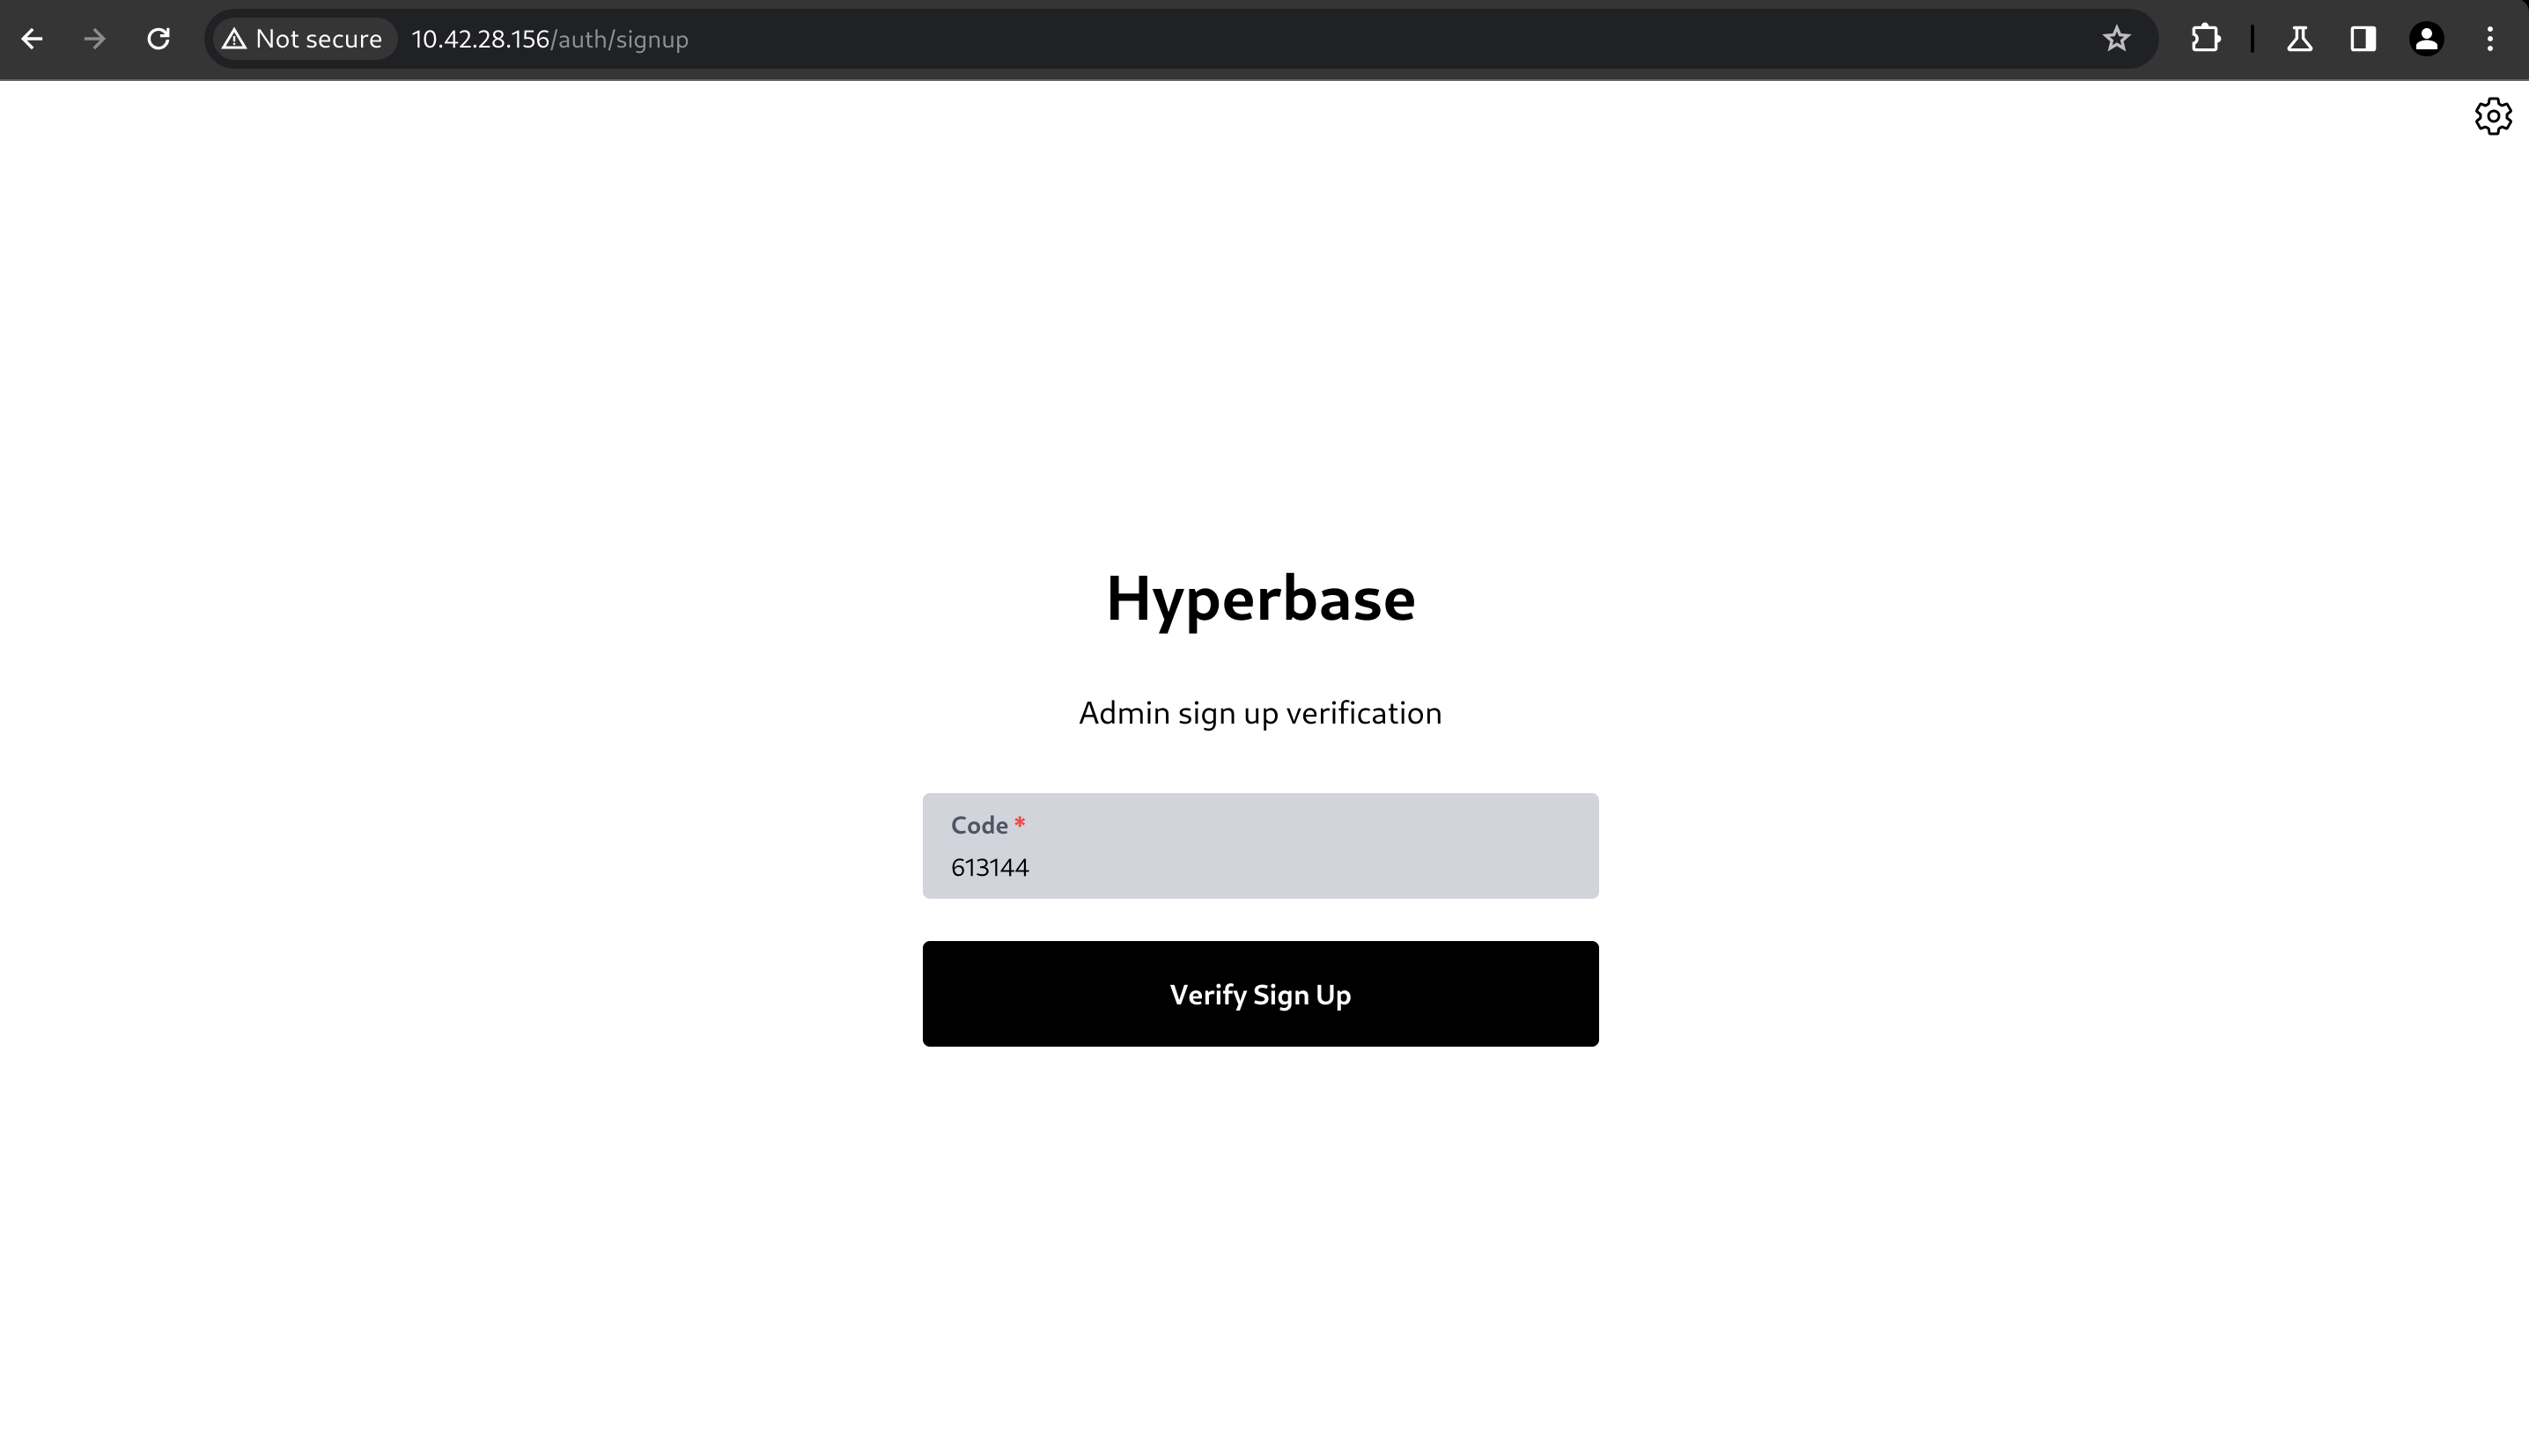
-
If your verification code is correct, you will be redirected to the sign in page.
Sign In
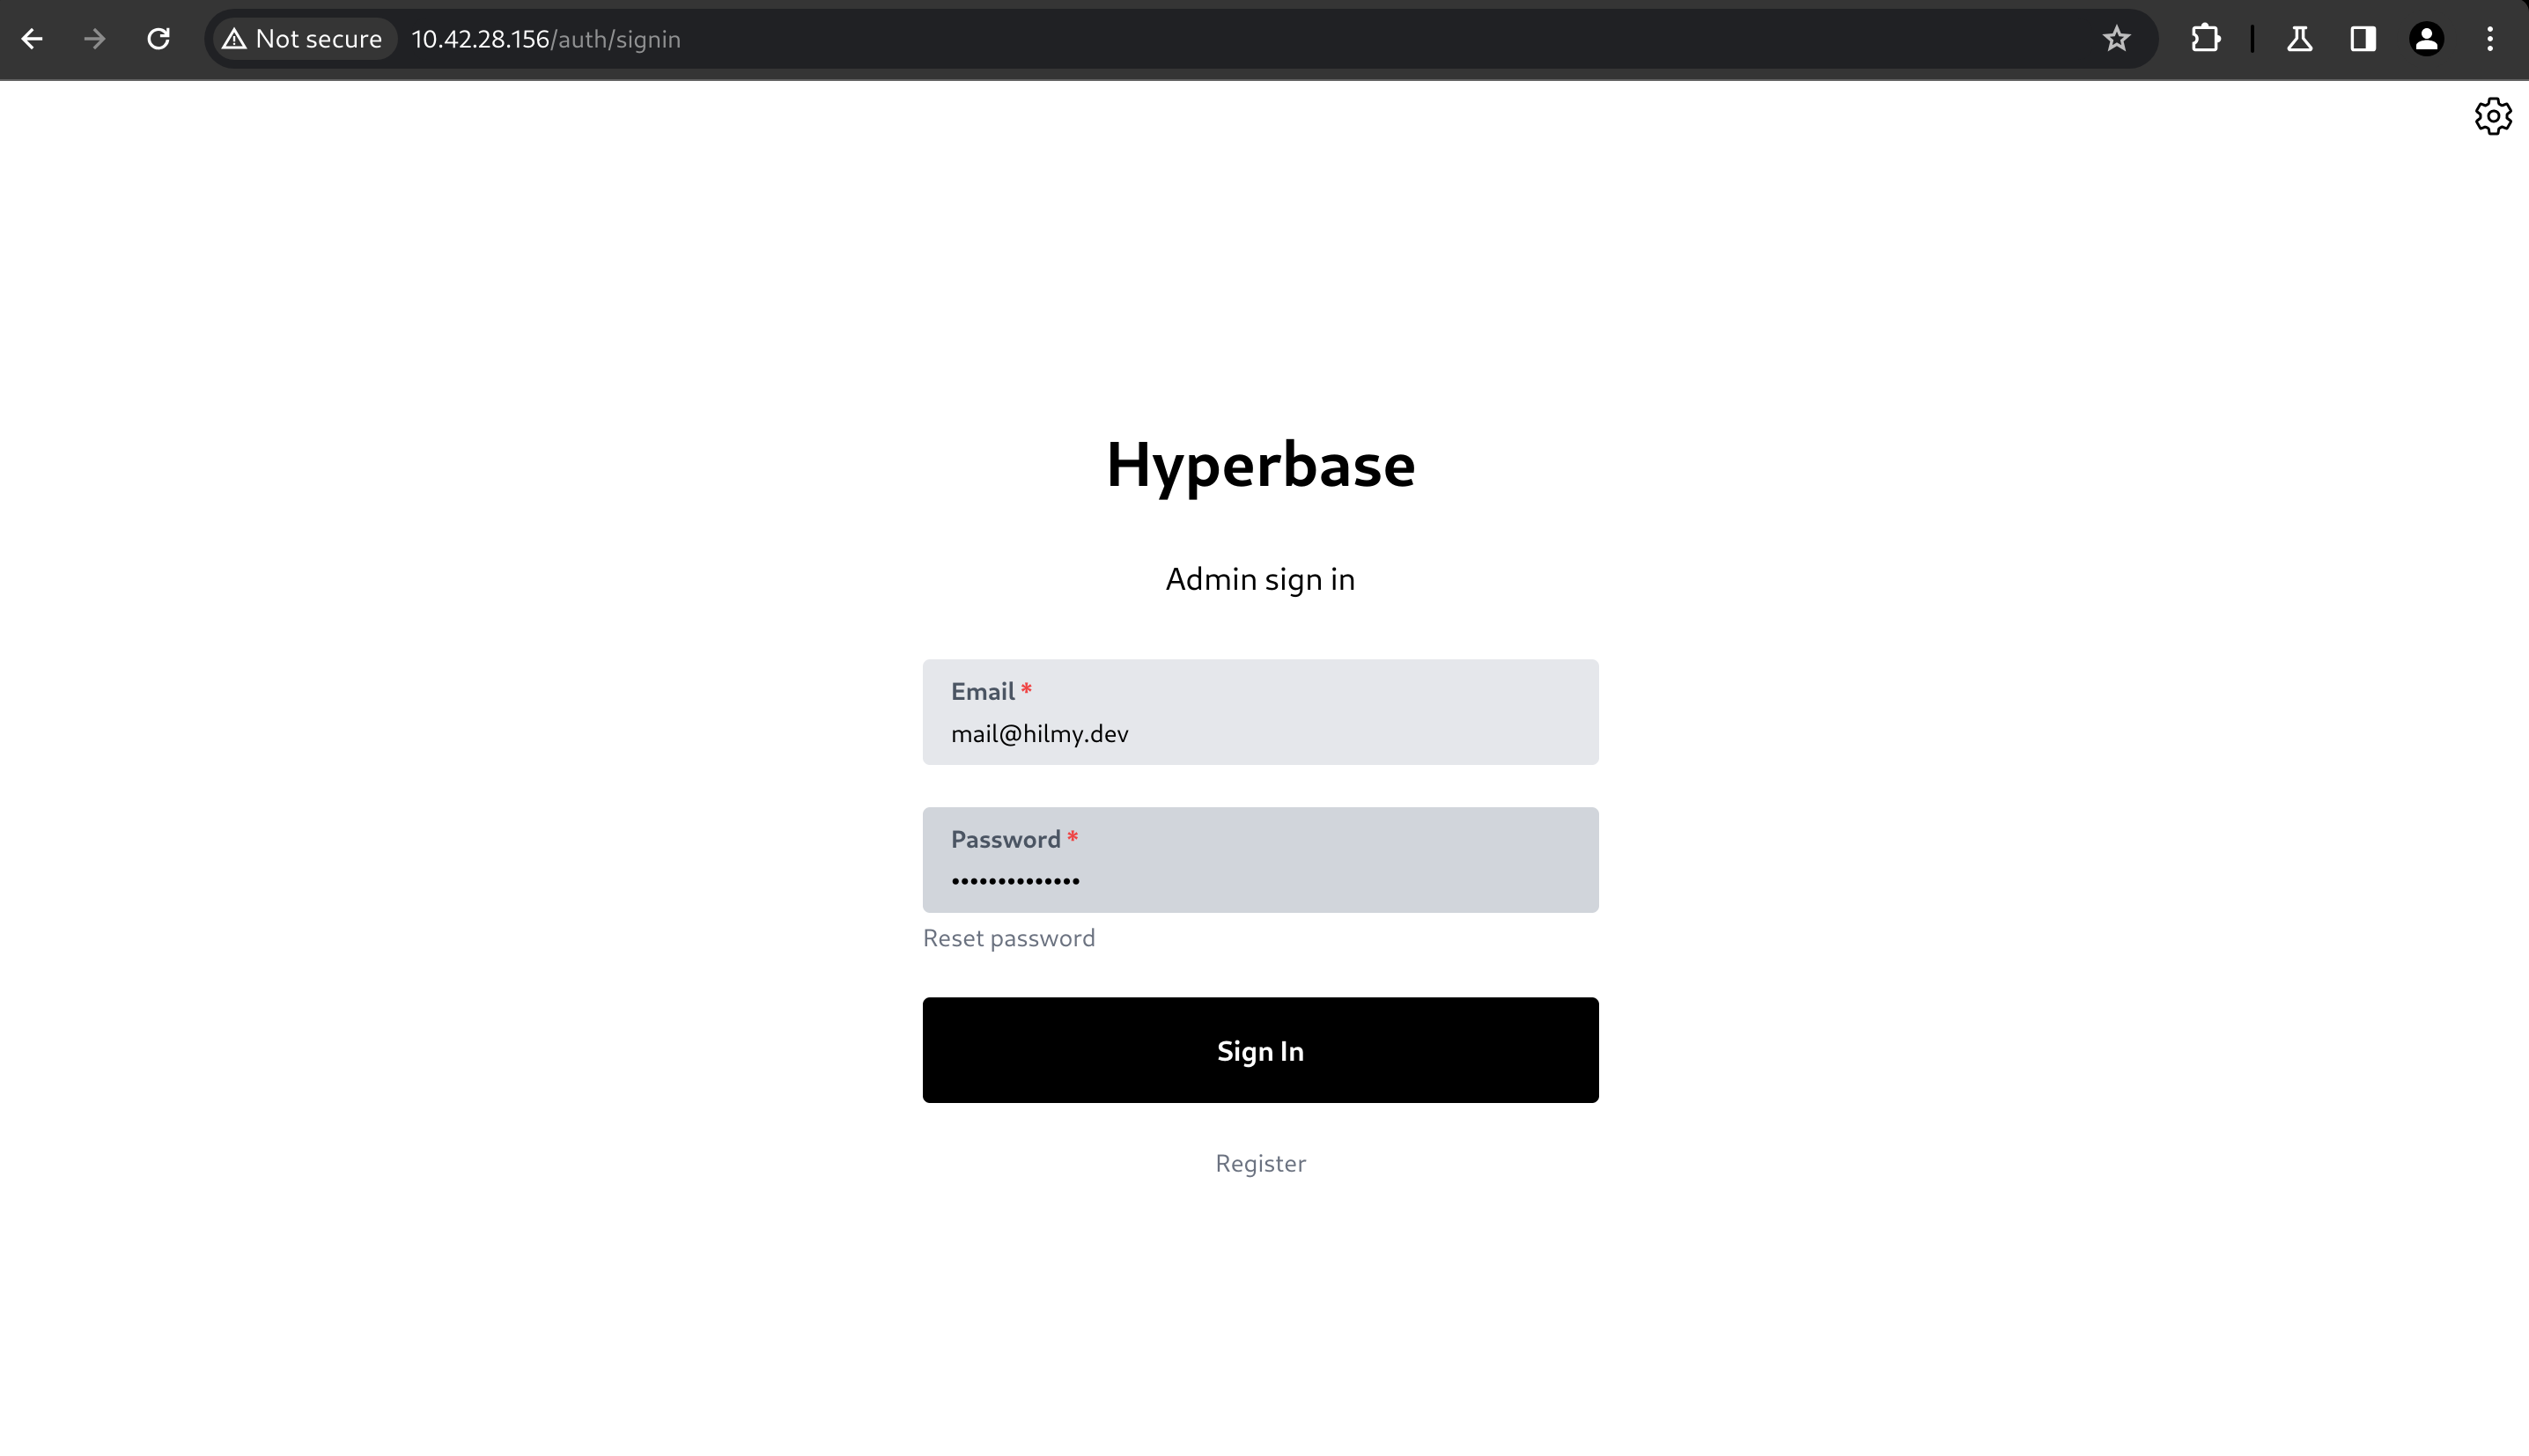
To enter the Hyperbase UI dashboard, you can fill in the email and password fields, then click Sign In. If you forget the password, click Reset password.
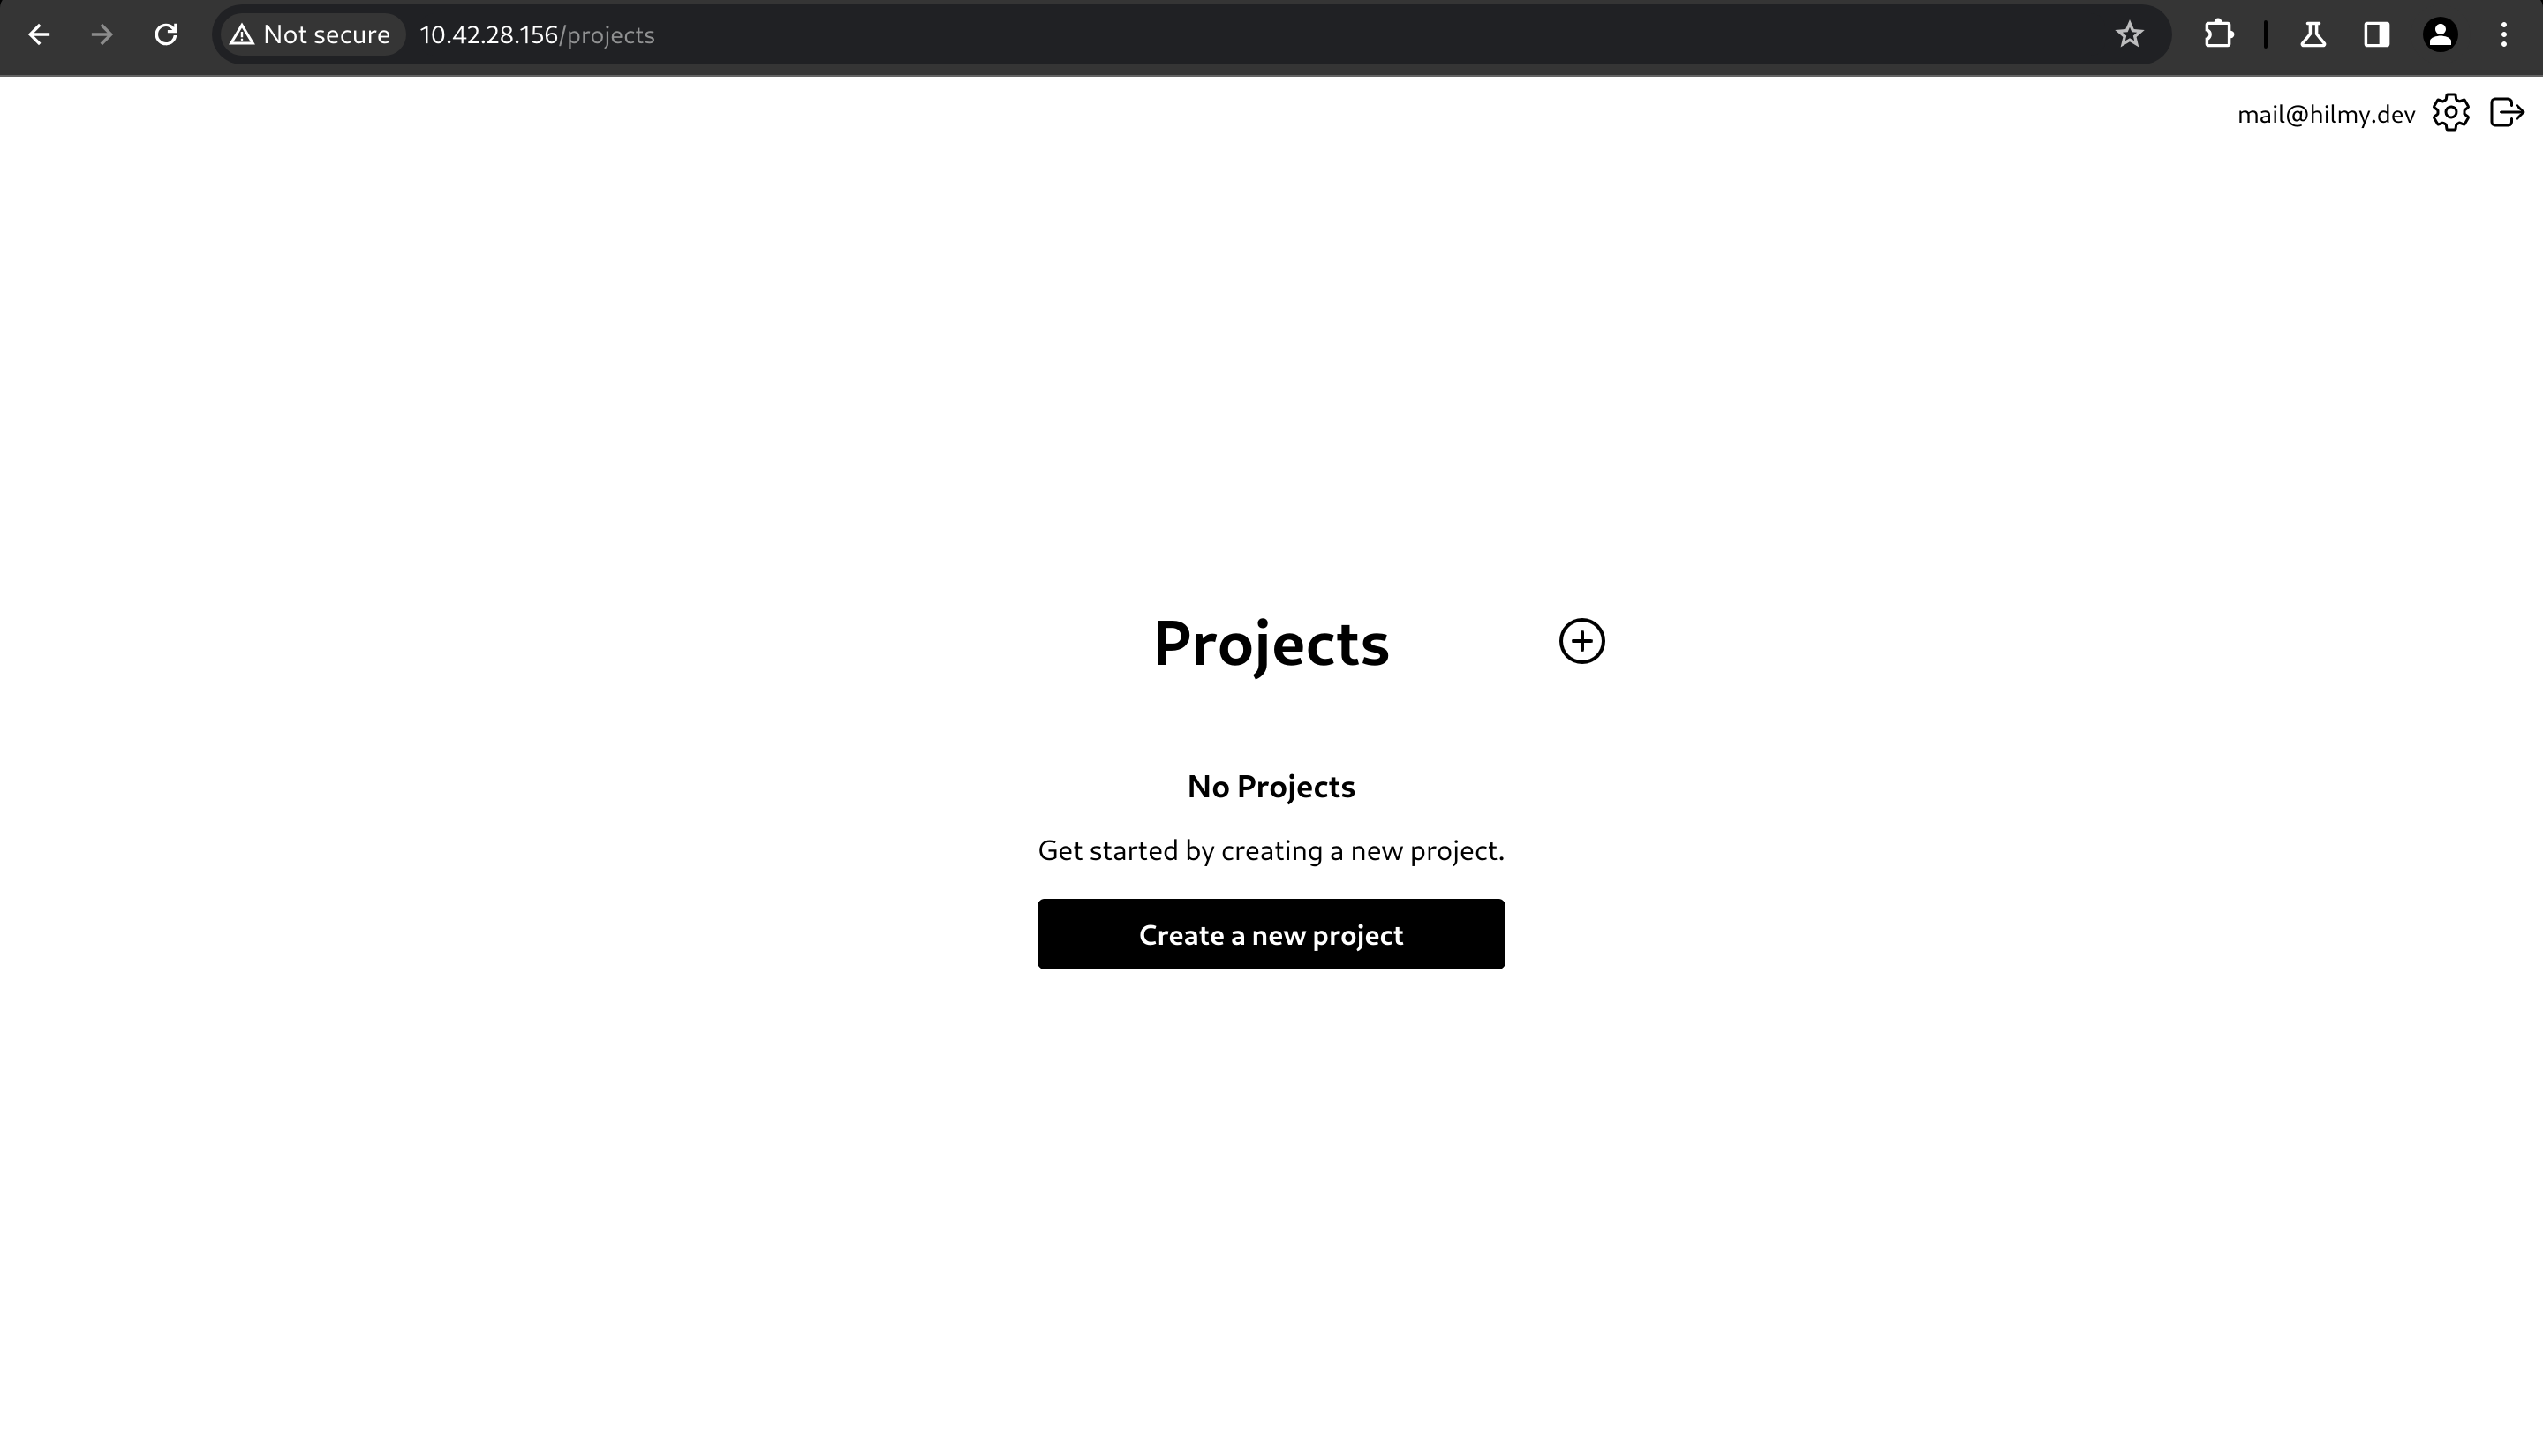
Create Project
-
To create new project, click Create a new project.
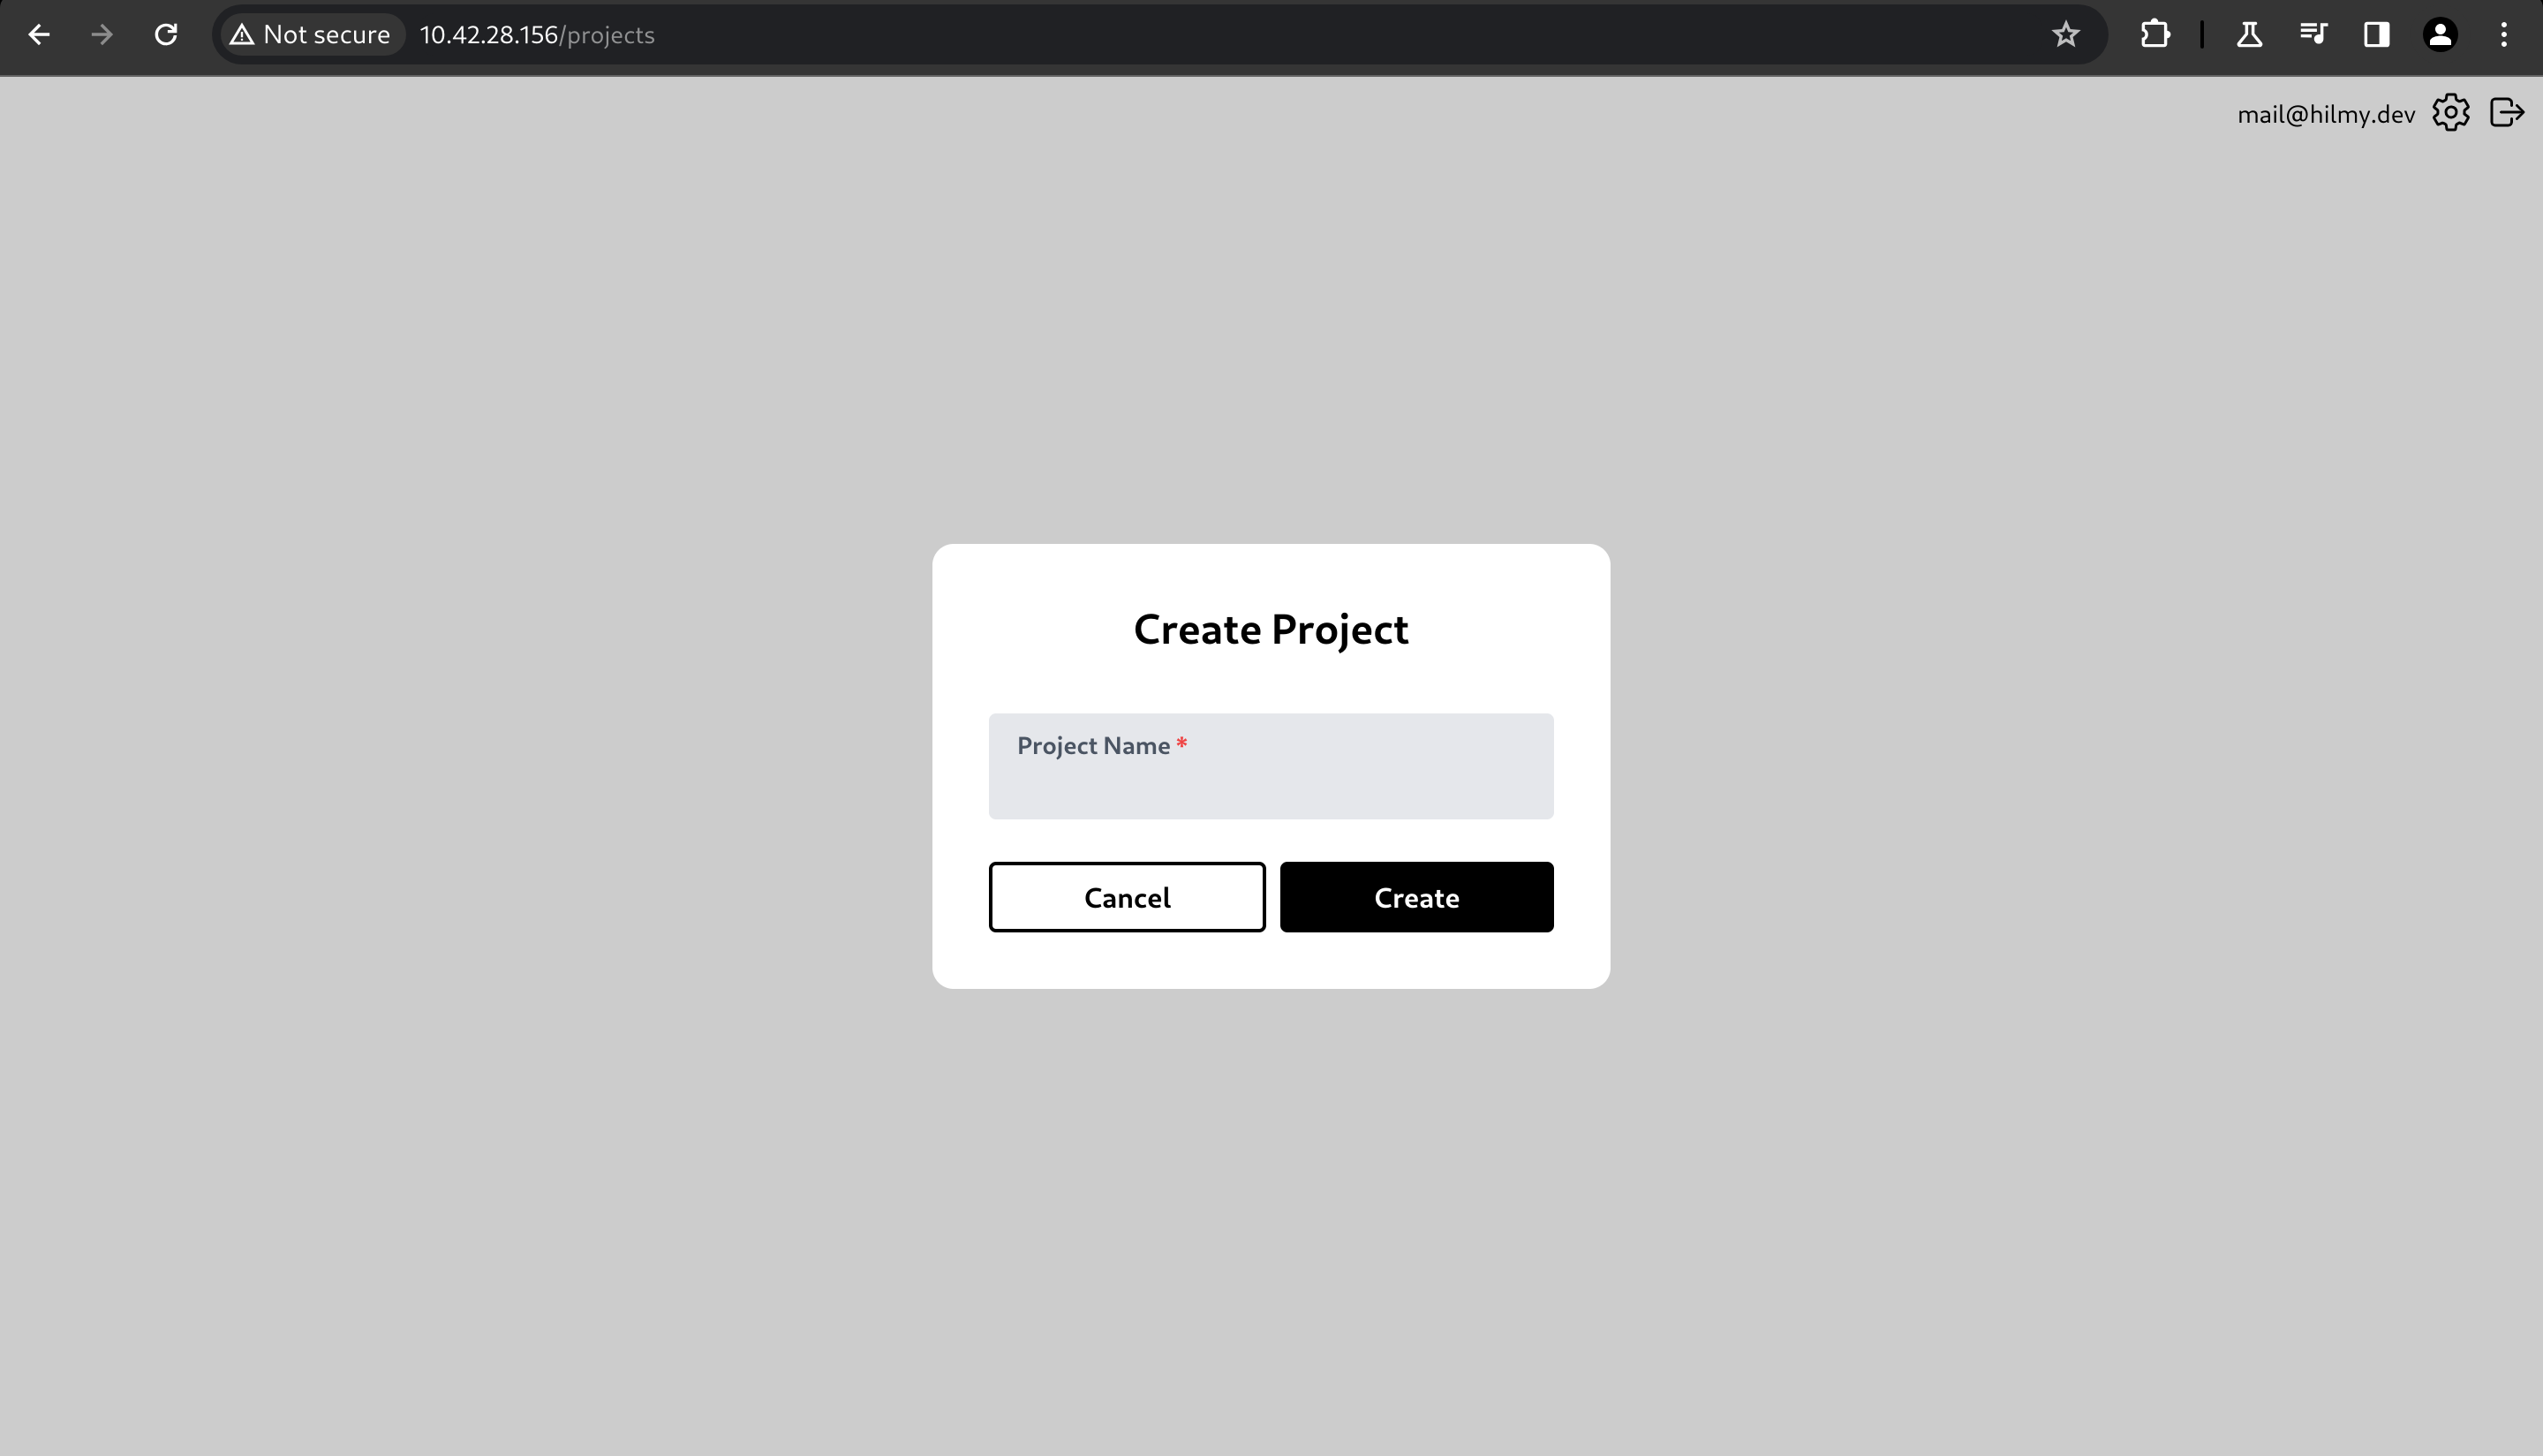
-
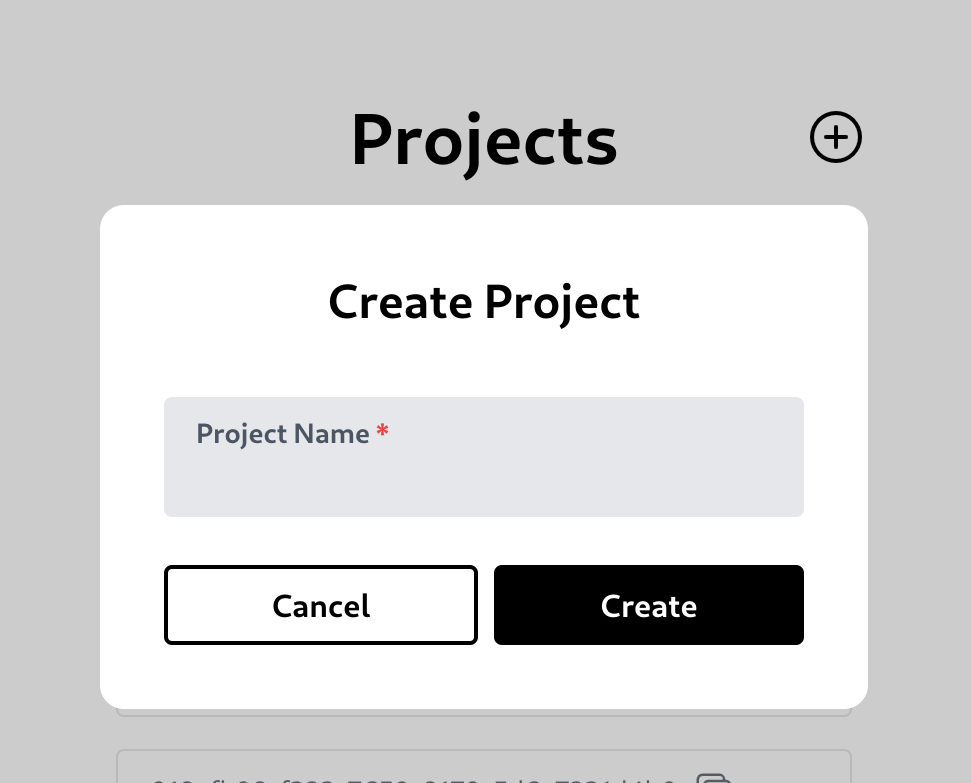
Fill in the Project Name field, then click Create.
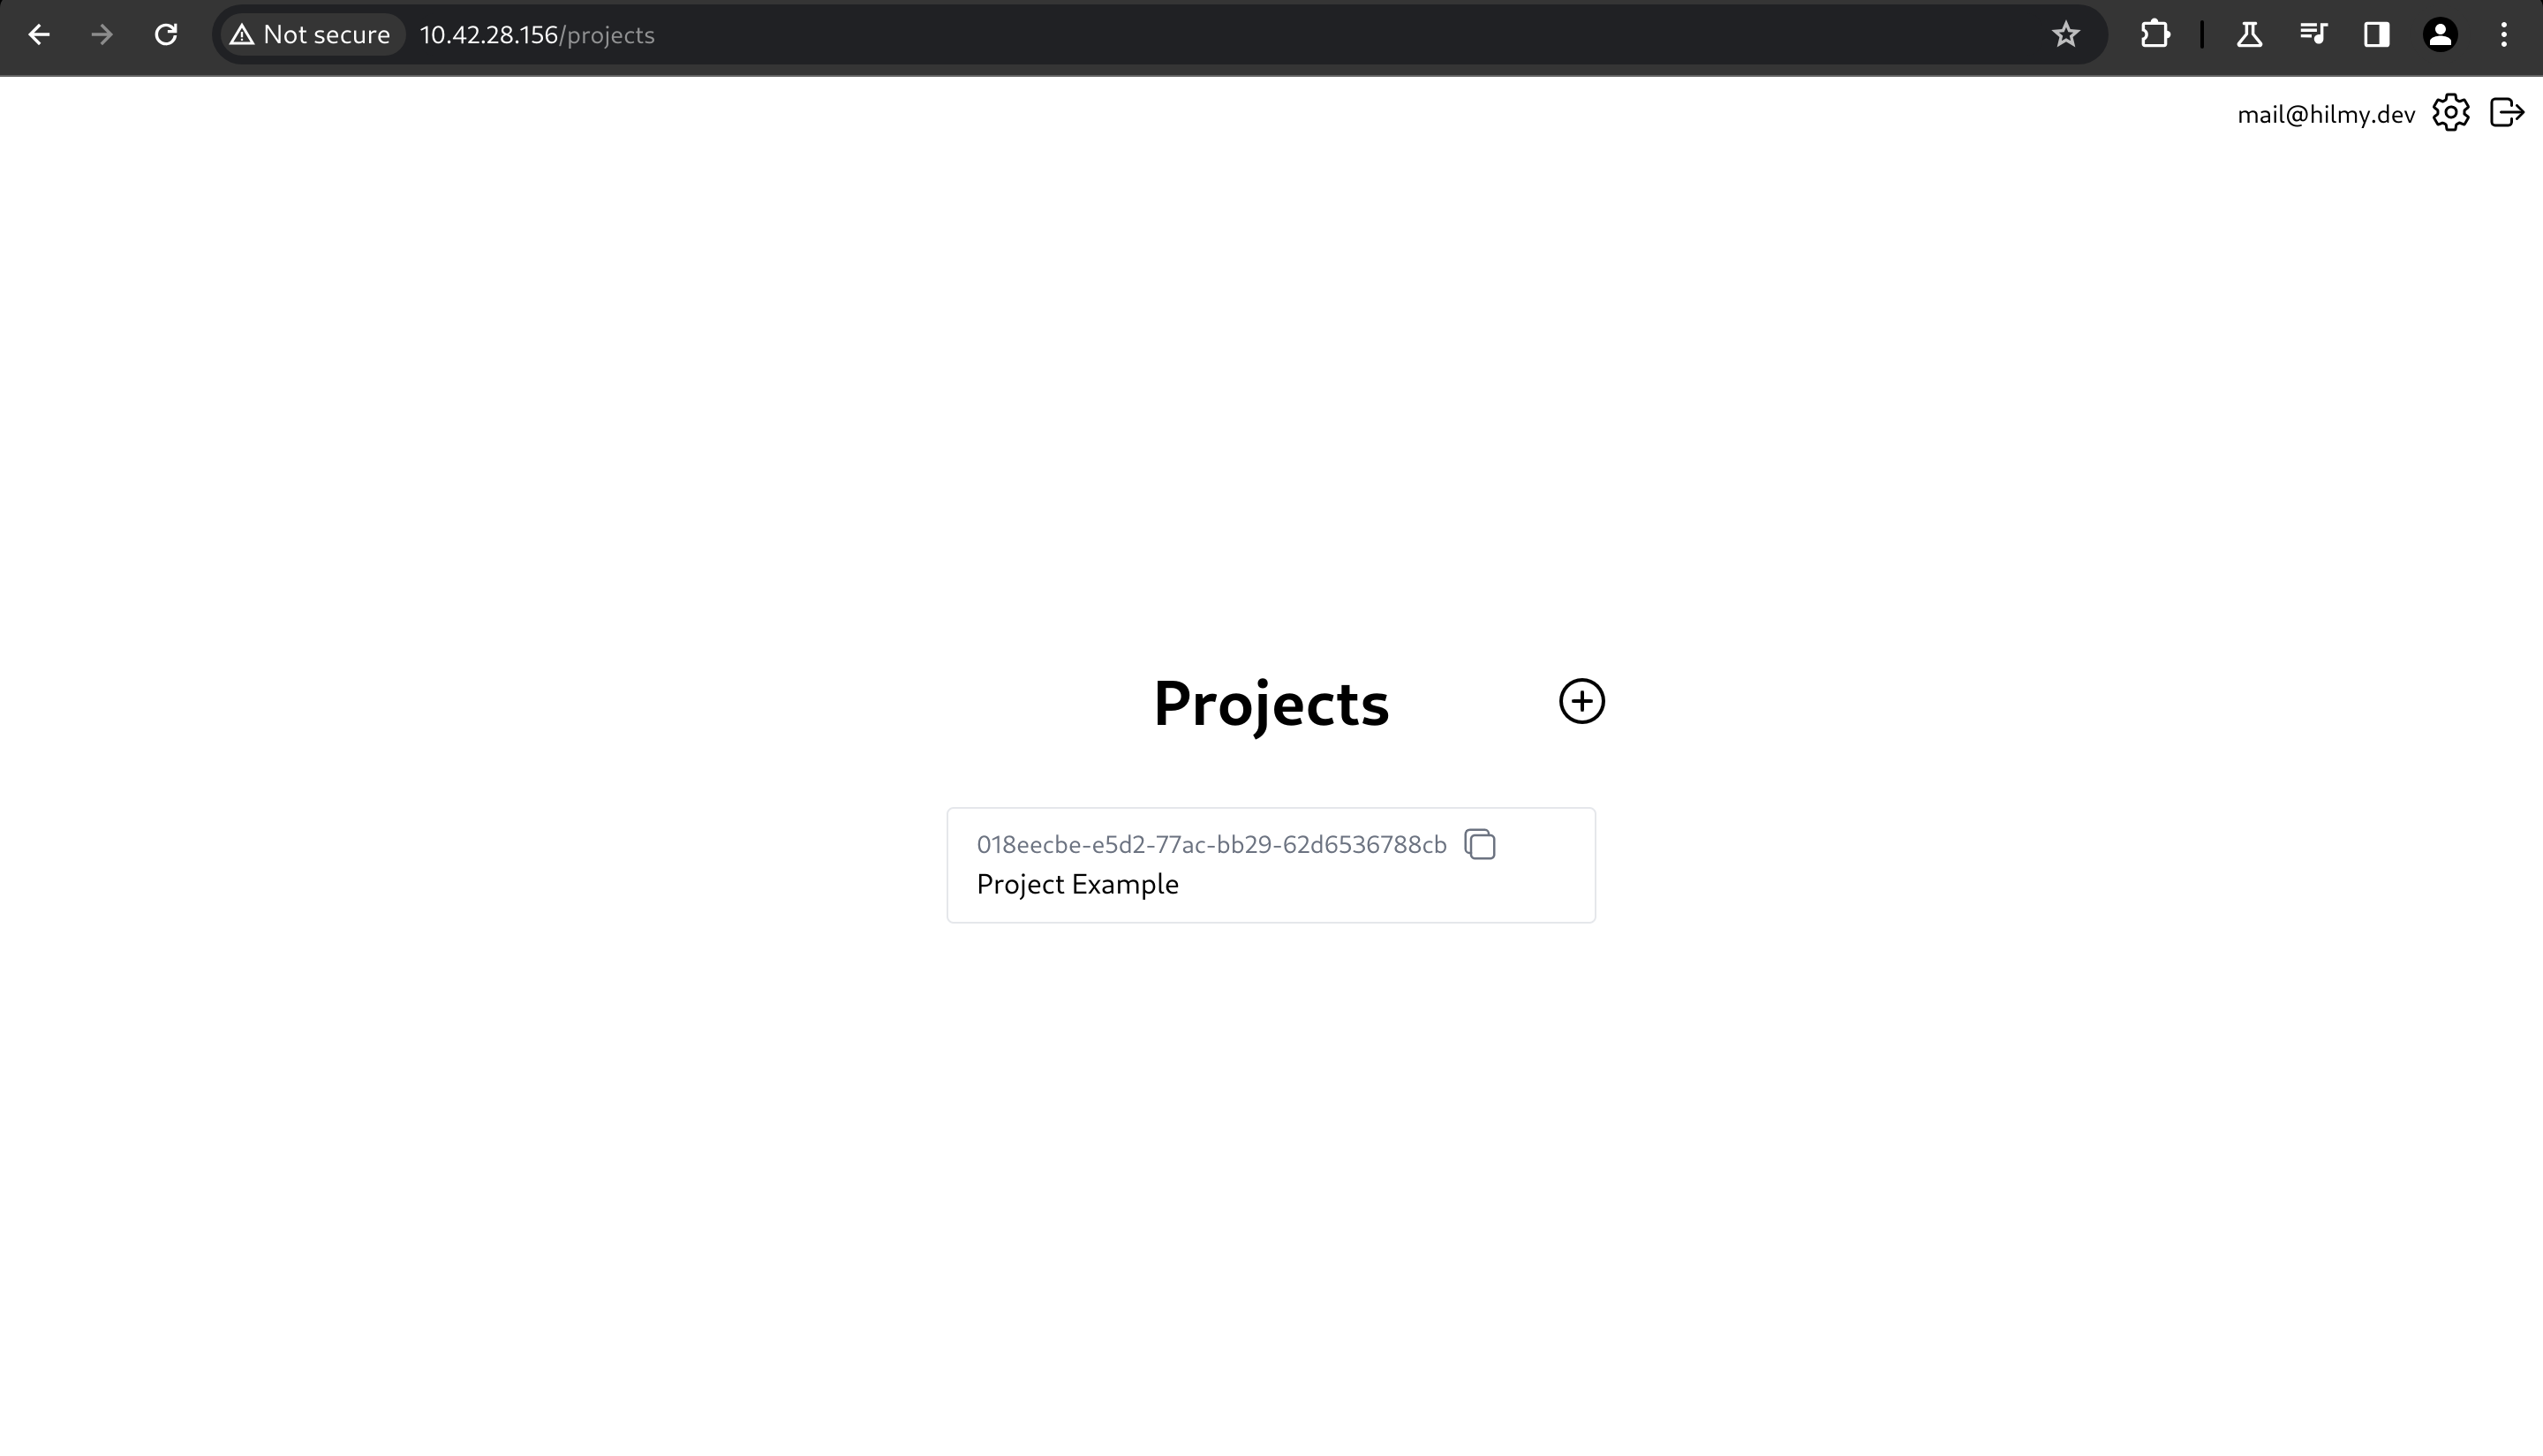
-
Click the newly created project.
NOTE: You can create unlimited projects, depending on your needs and server storage.
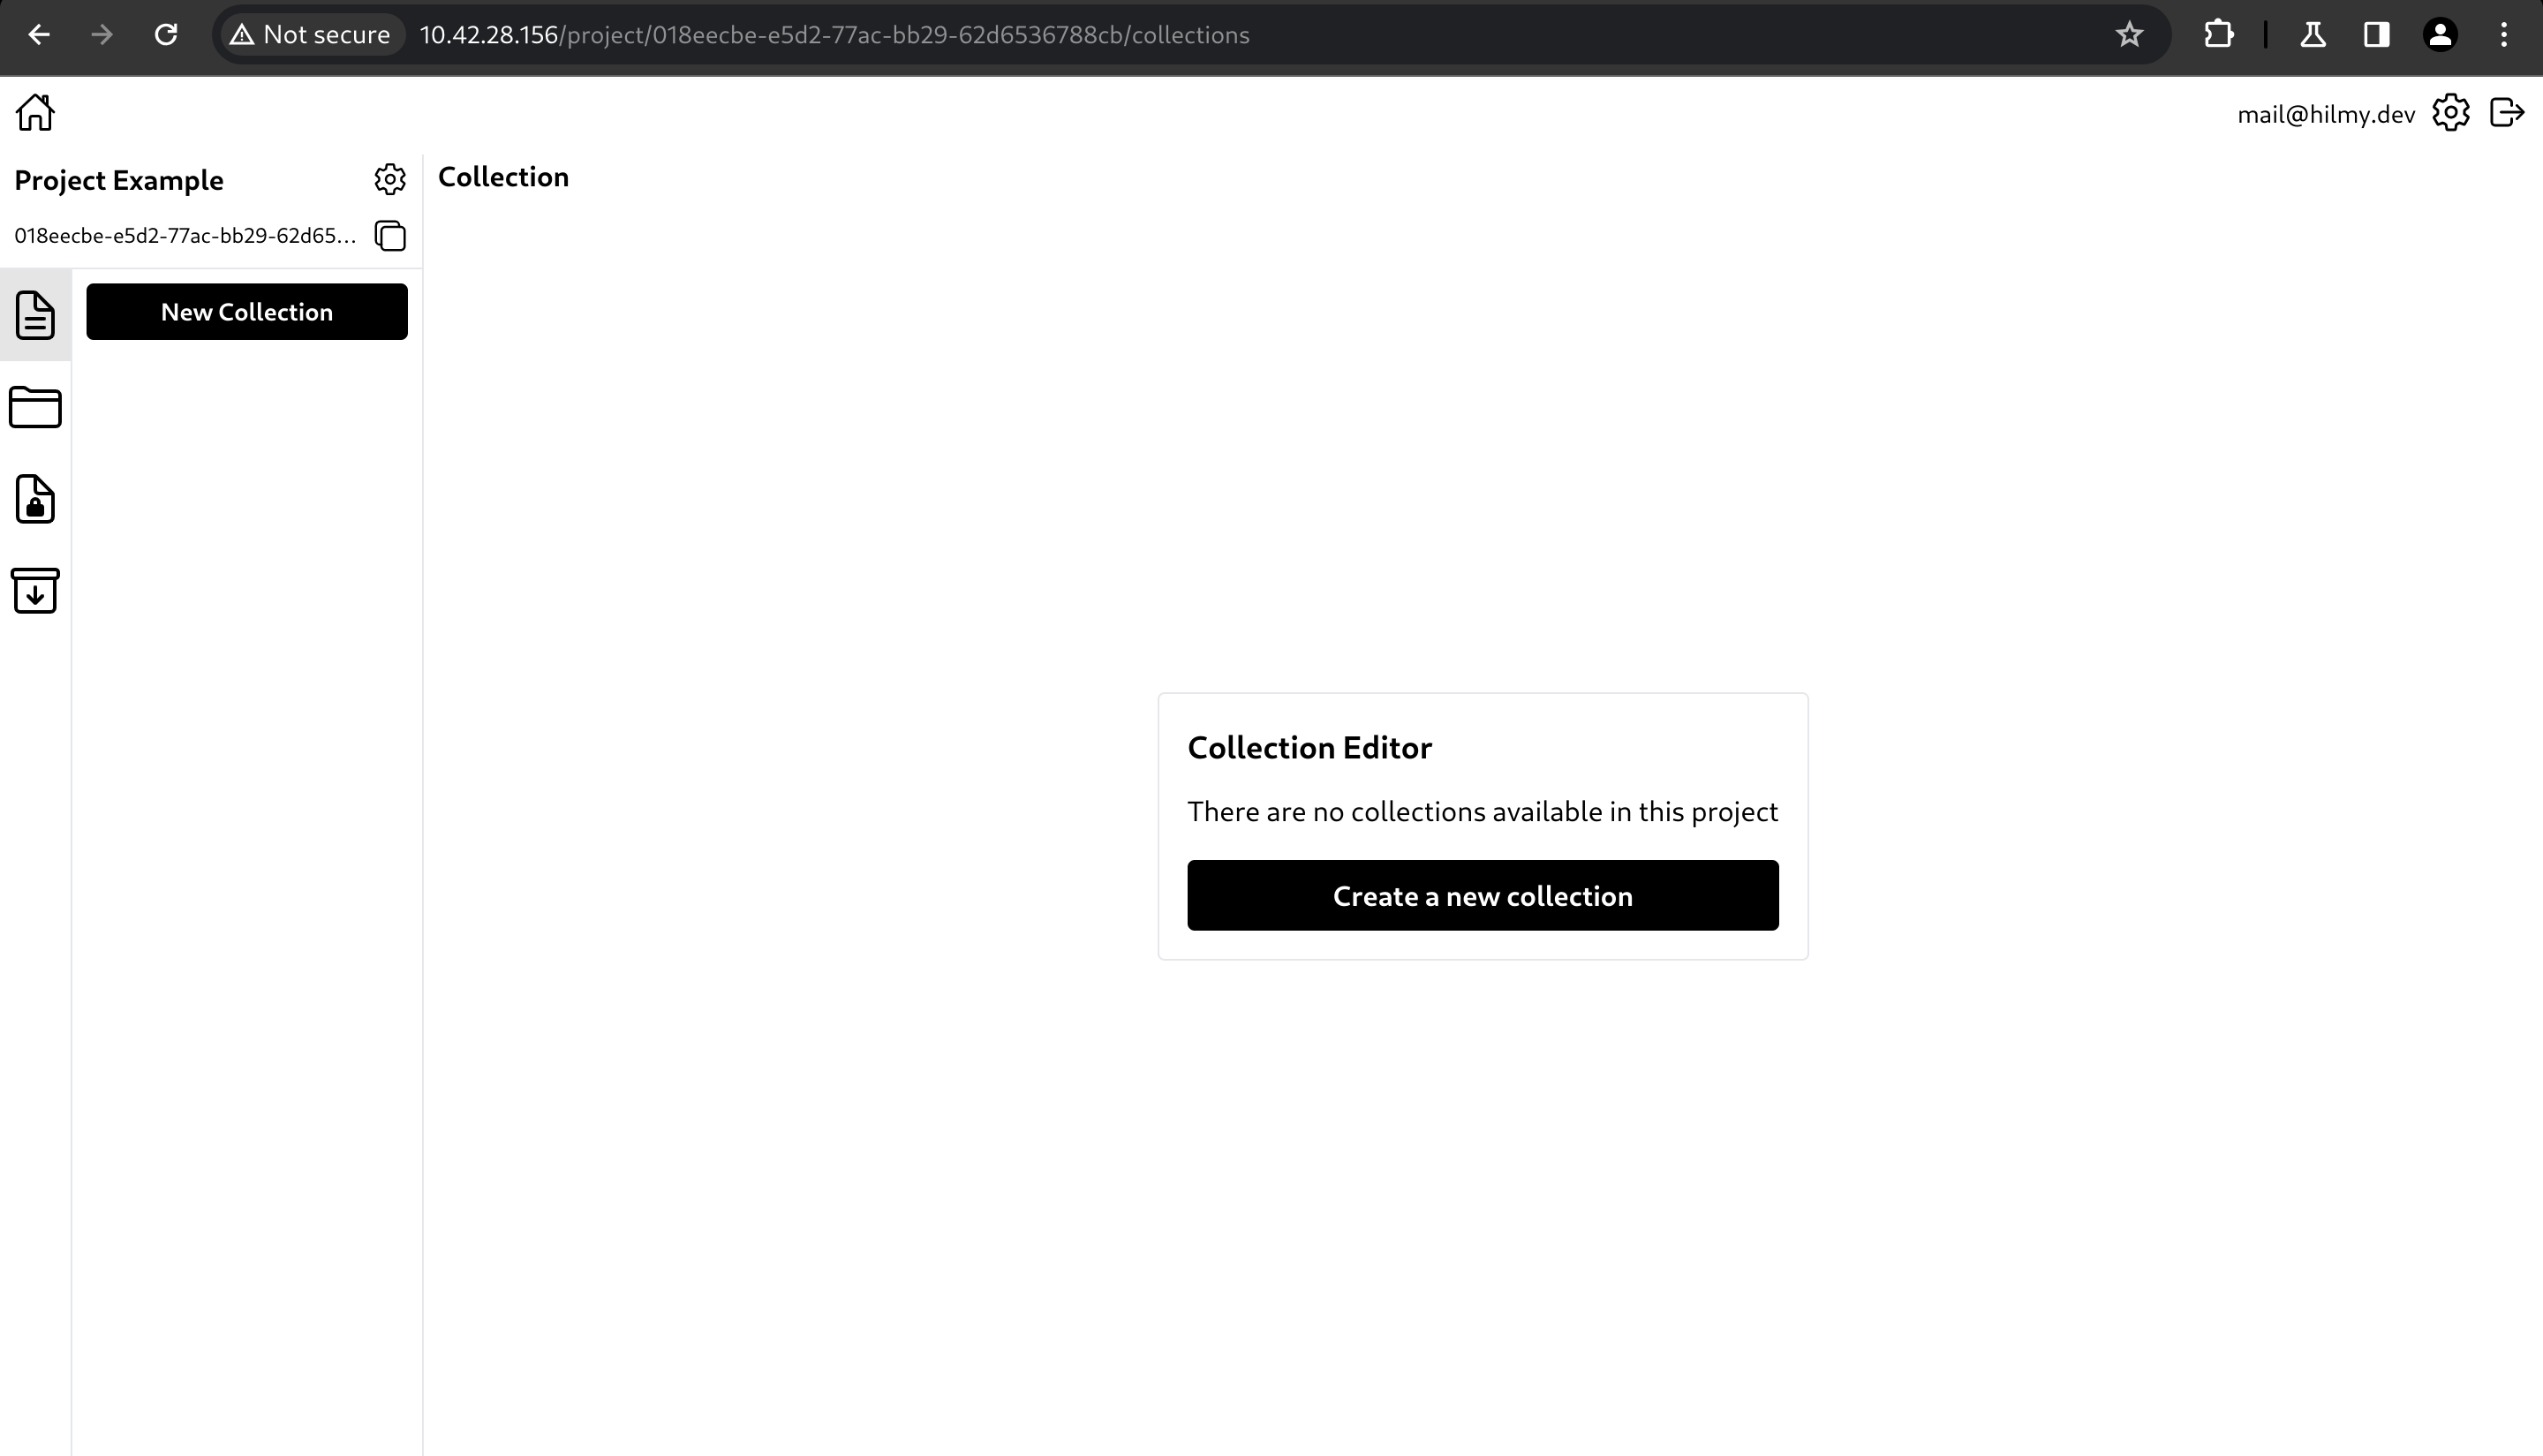
Create Collection
If you want to store data, you need to create a collection. Collection is a container for storing data so that the data is grouped.
In Hyperbase, collections are schema-based databases, meaning that data inserted to the collection must conform to its schema. Parts of the data that are not in the schema will be ignored and parts of the data that are in the schema but not in the data will be treated as null.
-
To create a collection, click New Collection or Create a new collection.
-
A side panel with a form will appear.
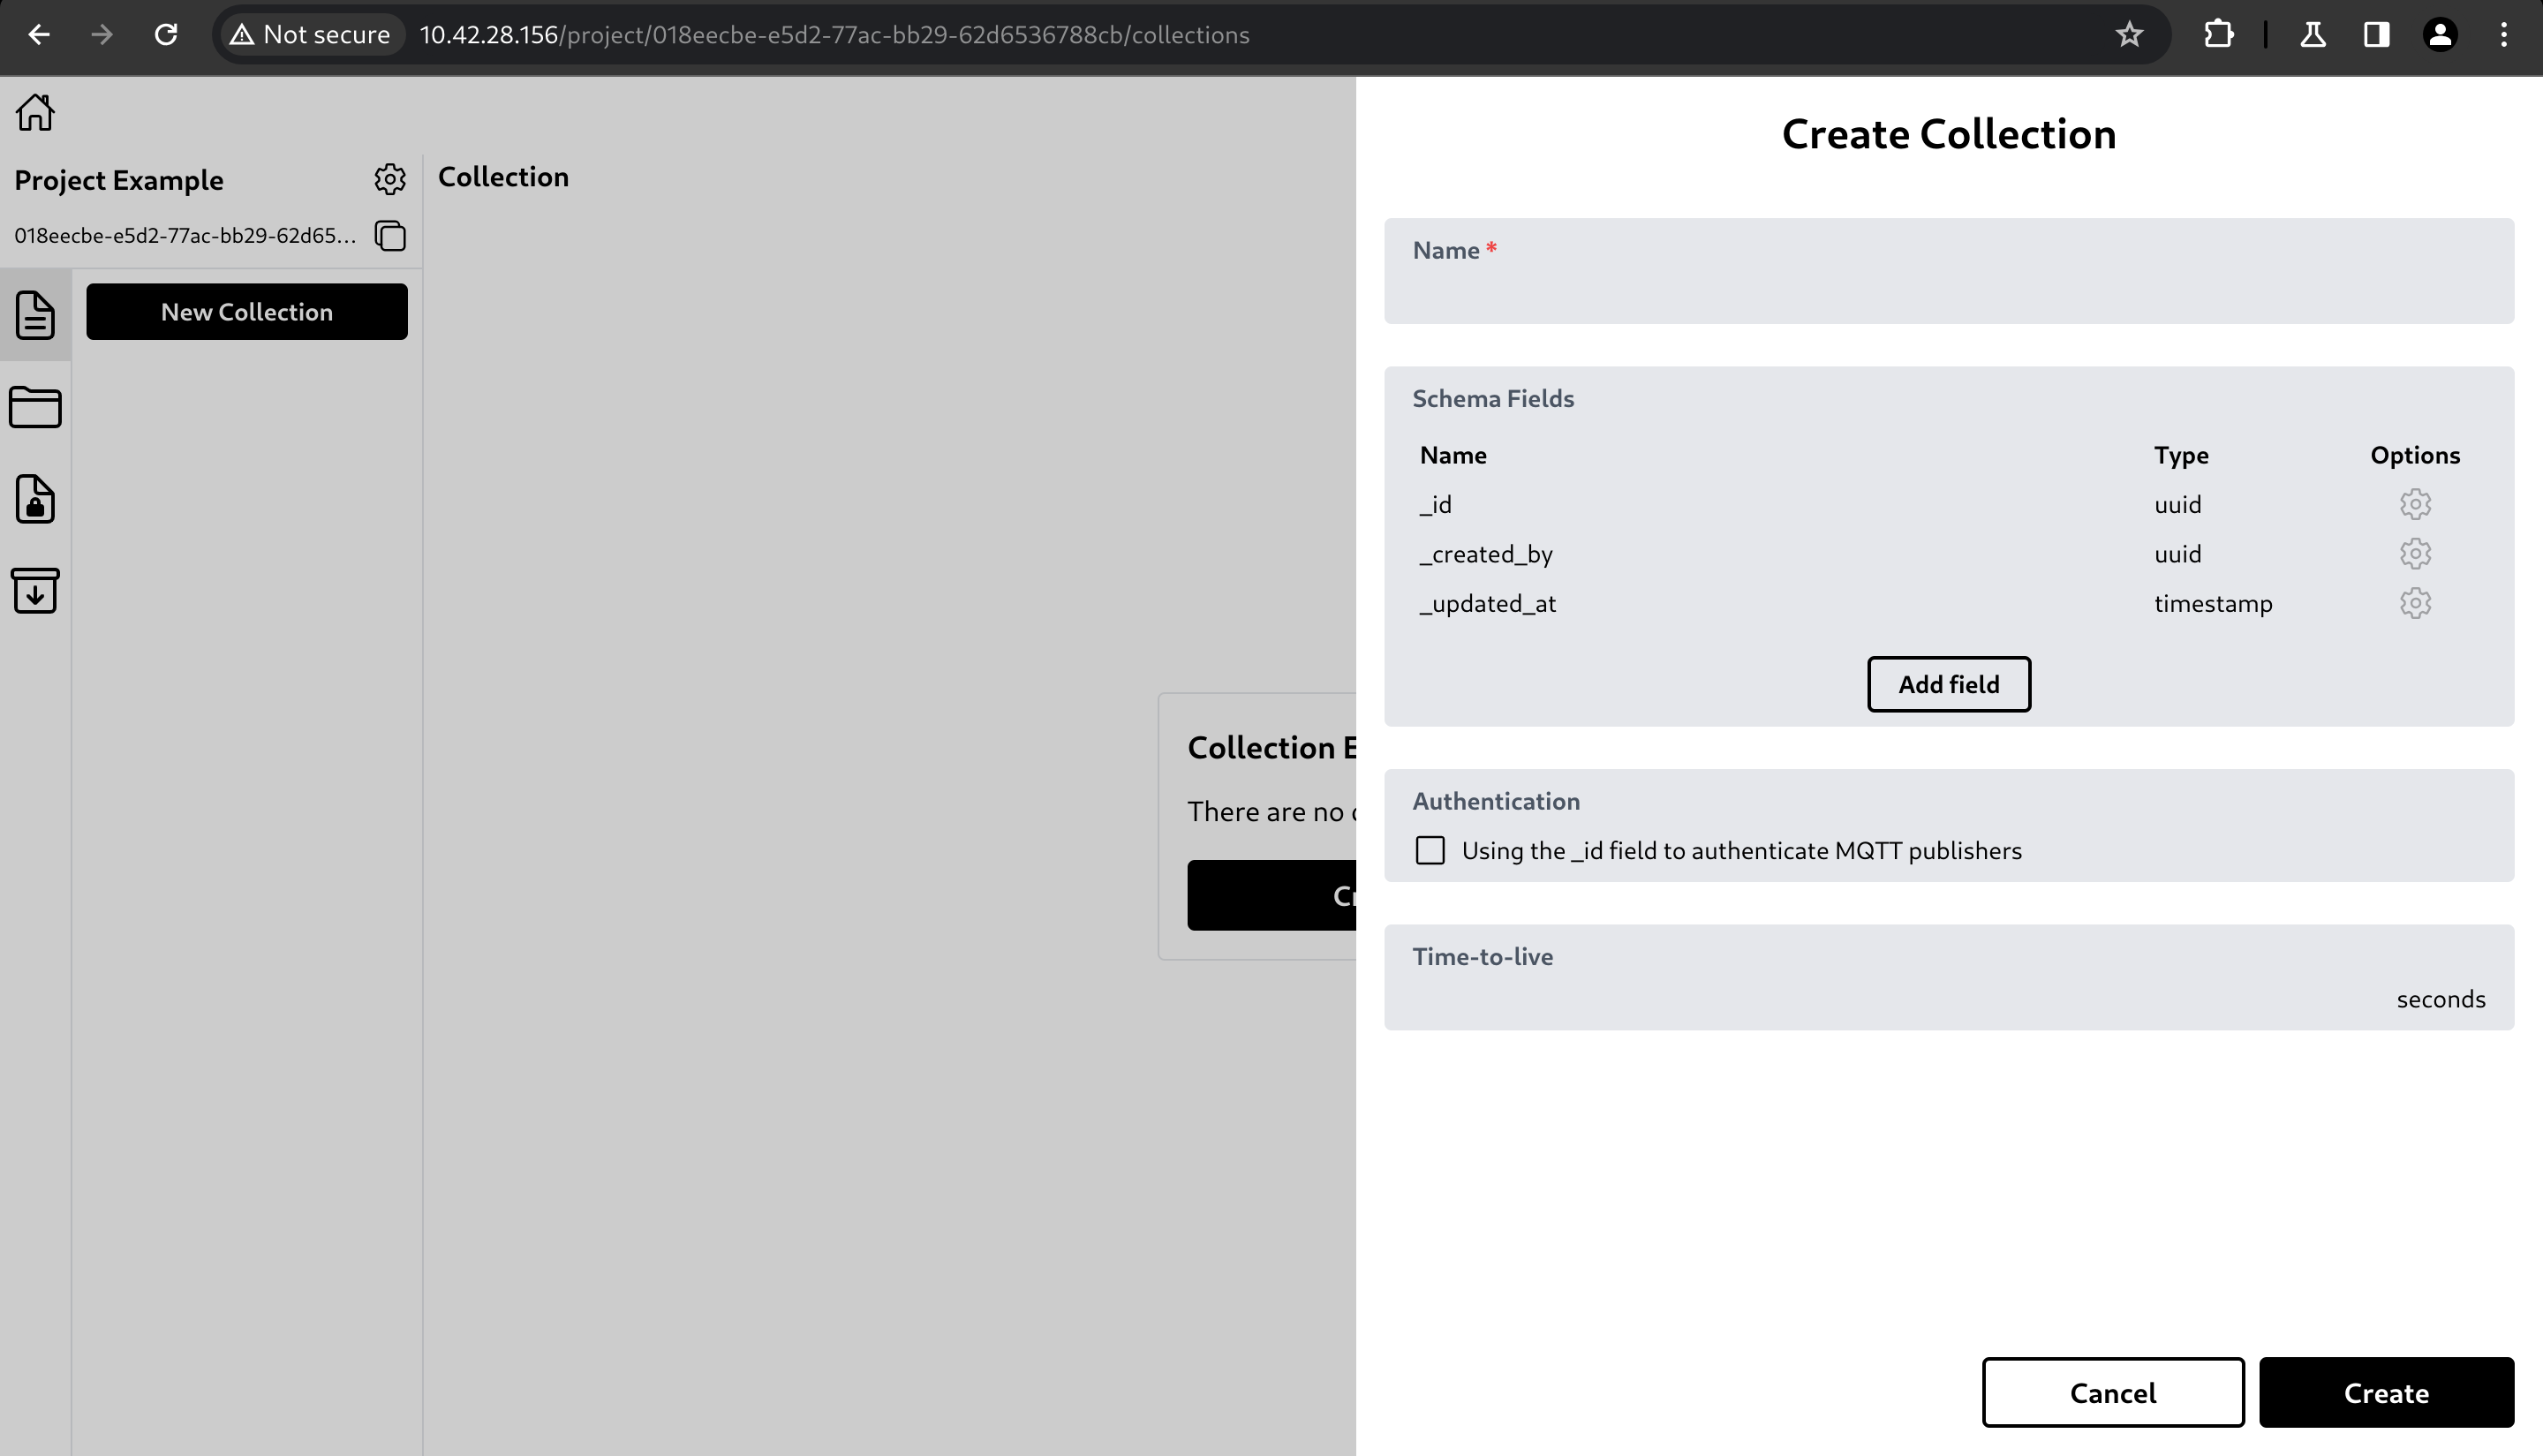
The form has the fields below.- Name: Collection name.
- Schema field: The structure of the data to be stored.
- Authentication using _id: Uses the _id field to authenticate MQTT publishers (uses auth token with user field).
- Time-to-live: The duration before the data is considered expired. Once the duration has passed, the data will be deleted.
-
After clicking Create, the collection will be created.
Create Bucket
Buckets are like a collections for files. Buckets are used to store files and group them. Unlike collections, buckets have no restrictions on file types or sizes. Size limitations may be applied due to server capabilities or the network conditions.
-
To create a bucket, click New Bucket or Create a new bucket.

-
A side panel with a form will appear.

The form has the fields below.- Name: Bucket name.
- Time-to-live: The duration before the file is considered expired. Once the duration has passed, the file will be deleted.
-
After clicking Create, the bucket will be created.

Create Access Token
Access tokens are used by app users to access and/or manipulate data in Hyperbase. This will enforce security rules to control the access of app users so that data can only be accessed and manipulated by those who are authorized.
-
To create an access token, click 'New Token' or Create a new token.

-
A side panel with a form will appear.

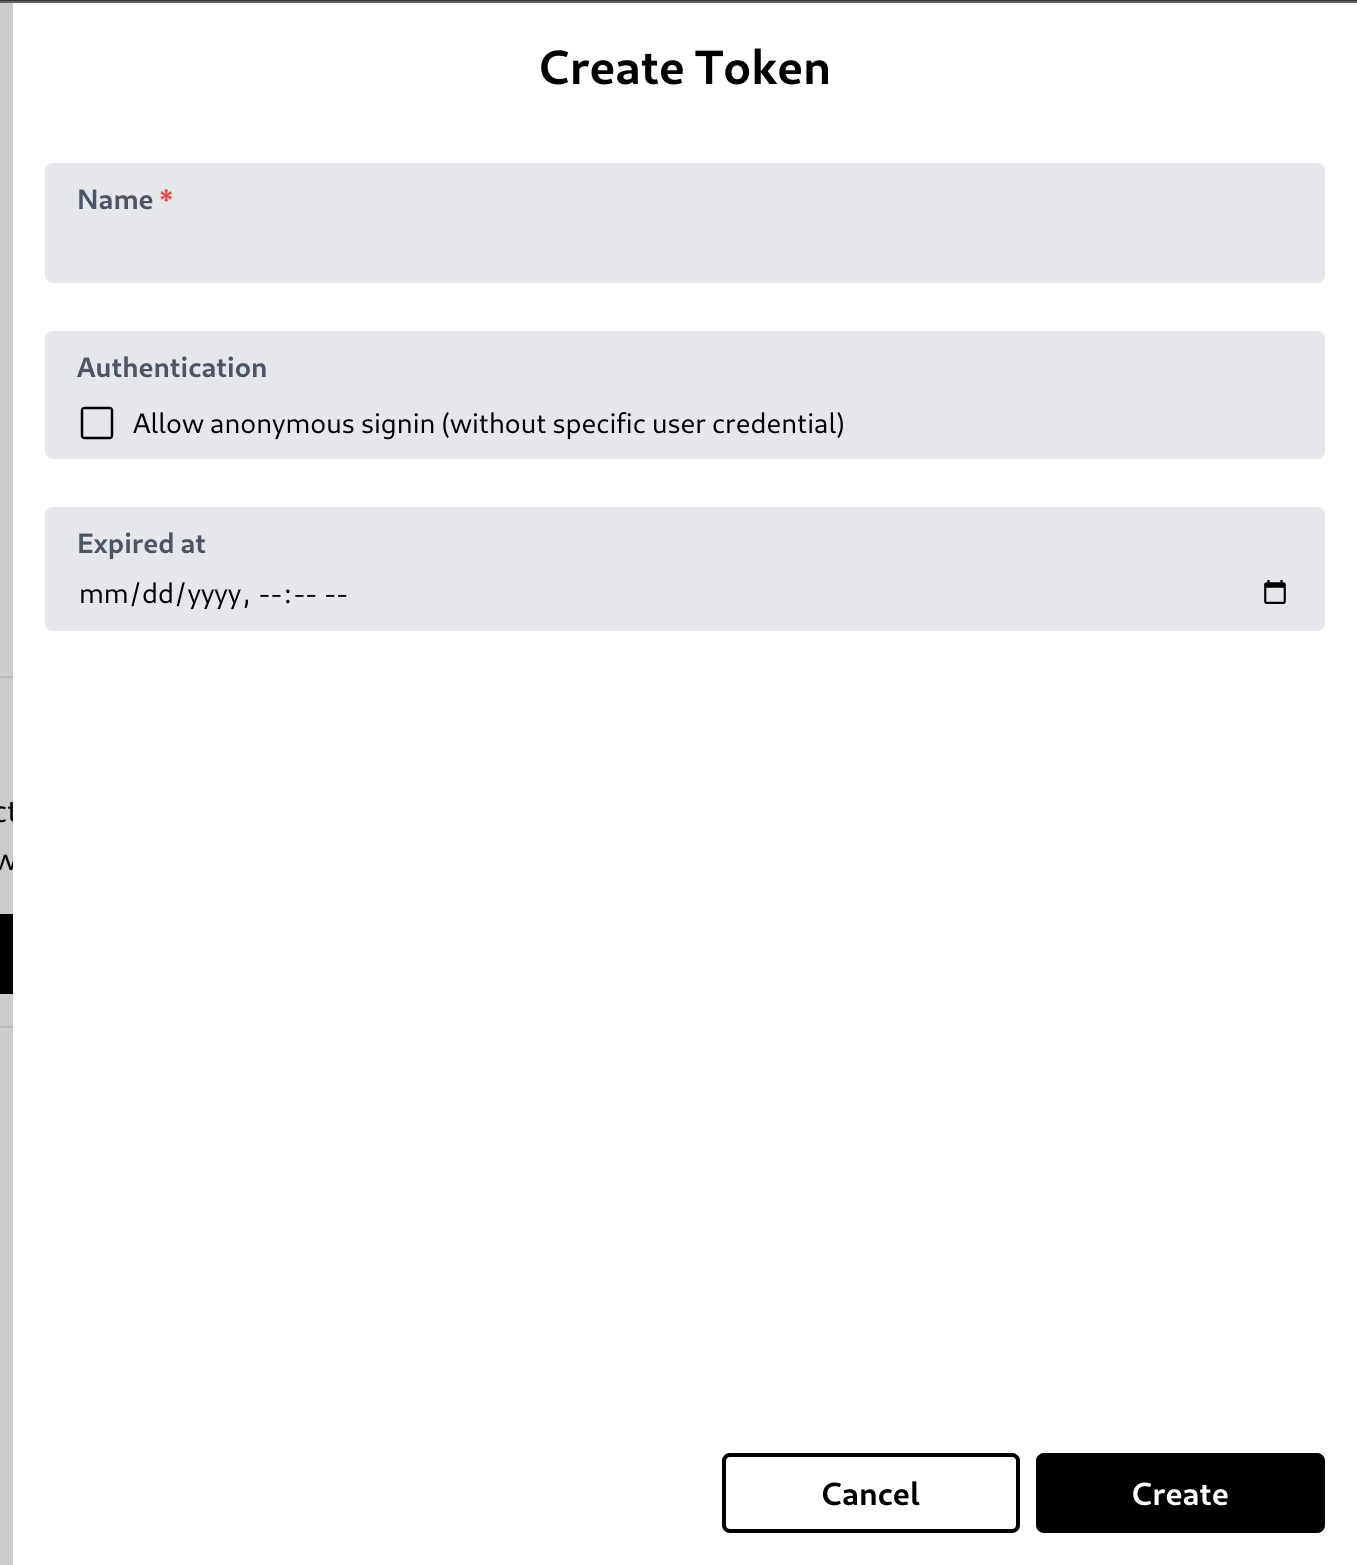
The form has the fields below.- Name: Access token name.
- Anonymous authentication: Allow app user to sign in without an account (just send this token, without specifying their account credentials).
- Expired at: The time this token will expire. Once expired, this token can no longer can be used to authenticate app user, unless the expired at value is removed or changed to a future time.
-
After clicking Create, the access token will be created.

You need to configure the access controls of each collection and bucket before app users can access and/or manipulate them. Follow the steps below to configure one of them.
- Click Insert collection rule, a editable row will appear. After configuring the access control, click save icon. After that, you can use this token to access and/or manipulate this collection based on these rules.
 \
\
- All: All app users have permission to perform the specified rule.
- Self Made: Only app users who created the data have permission to perform the specified rule.
- None: All app users do not have permission to perform the specified rule.
- True: App users have permission to perform the specified rule.
- False: App users do not have permission to perform the specified rule.
You can make other collection rules or bucket rules in the similar way.
API
After creating access tokens, your application can access the data based on the rules applied. To do that, you can explore the provided API on this section.
Installation
There are two methods to install Hyperbase to your machine:
Pre-compiled Binaries
The recommended way to install Hyperbase using pre-compiled binaries is to utilize Docker. You can visit the Docker website for instructions on how to install and use Docker.
Hyperbase image can be found at this link.
If needed, you can also use Hyperbase UI image from this link.
You can pull the image using this command:
$ docker pull mnaufalhilmym/hyperbase
$ # docker pull mnaufalhilmym/hyperbase-ui
After pulling the image, you can proceed to setup.
Build From Source
This section will cover how to build Docker image from source. Before doing so, you can visit the Docker website for instructions on how to install and use Docker. You will also need git to clone the source repository. Visit the git website to install git and learn how to use it.
To build the source code, you need to follow these steps:
- Clone the Hyperbase source code hosted from this GitHub repository. You can also clone the Hyperbase UI source code form this GitHub repository and follow similar next steps.
$ git clone [email protected]:HyperbaseApp/hyperbase.git
$ # git clone [email protected]:HyperbaseApp/hyperbase-ui.git
-
Open the local directory of the repository.
-
Build the source code using Docker.
$ docker build . -t mnaufalhilmym/hyperbase
$ # docker build . -t mnaufalhilmym/hyperbase-ui
After successfully build the image(s), you can proceed to setup.
Setup
This section covers how to set up Hyperbase so that you can use all its features.
MQTT
The first step is to setup MQTT broker. Hyperbase uses MQTT to allow any microcontrollers or other devices to insert data through message publishing via a specific MQTT topic defined in Hyperbase config file. We recommend EMQX as the MQTT broker. The easiest way is to install it from the Docker Hub.
You need to configure MQTT authentication and authorization once Hyperbase is running to prevent security issues. You can follow the Post-installation section.
Database Backend
You can choose one of PostgreSQL, MySQL, SQLite, or any other database compatible with any of the three. Note that we only tested PostgreSQL, MySQL, and SQLite so we recommend choosing one of them especially for production environment. Don't forget to configure a secure username, password, and database name. Also make sure the connection exposed by the database is secure.
We recommend using Docker to install the database.
Hyperbase
To run Hyperbase, you can run this command.
$ docker run --name hyperbase -v config.yml:/app/config.yml -p 8080:8080 mnaufalhilmym/hyperbase
NOTE: Adjust the config.yml path and the exposed port.
Configuration file
You need a config.yml file. Below is an example of a configuration file.
app:
  mode: "development" # development or production

log:
  display_level: true
  level_filter: "info"
  db_ttl: 604800 # seconds

hash:
  argon2:
    algorithm: "Argon2id"
    version: "V0x13"
    salt: "cGSkx2yuzi6aHcHPyRQD2Tfi8CupDKu6HqKaMdT47nBBWaY2KS9tiLXKi4zEiwxd"

token:
  jwt:
    secret: "cGSkx2yuzi6aHcHPyRQD2Tfi8CupDKu6HqKaMdT47nBBWaY2KS9tiLXKi4zEiwxd7E4xBw2VKuMYRVd45bQHJ6TdWi27CiMEjQ4dsFPnn2hLA2UpenKBZEjppSe4A9Jy"
    expiry_duration: 604800 # seconds

mailer:
  smtp_host: "smtp.gmail.com"
  smtp_username: "smtp_username"
  smtp_password: "smtp_password"
  sender_name: "sender_name"
  sender_email: "sender_email"

db: # choose one database backend
  postgres:
    user: "user"
    password: "password"
    host: "localhost"
    port: "5432"
    db_name: "database_name"
    max_connections: 100
  mysql:
    user: "user"
    password: "password"
    host: "localhost"
    port: "3306"
    db_name: "database_name"
    max_connections: 100
  sqlite:
    path: "hyperbase.db"
    max_connections: 100

bucket:
  path: "/app/hyperbase-bucket"

api:
  internal:
    gossip:
      host: "0.0.0.0"
      port: 7472
      peers:
        - "0.0.0.0:7473"
        - "0.0.0.0:7474"
      view_size: 4
      actions_size: 30
  rest:
    host: "0.0.0.0"
    port: 8080
    allowed_origin: "example.org"
  websocket:
    heartbeat_interval: "5s"
    client_timeout: "10s"
  mqtt:
    host: "localhost"
    port: 1883
    topic: "mqtt_topic"
    username: "username"
    password: "password"
    channel_capacity: 100
    timeout: "10s"

auth:
  admin_registration: true
  access_token_length: 20
  registration_ttl: 600 # seconds
  reset_password_ttl: 600 # seconds
Explanation
-
app
- mode
You can choose betweendevelopmentorproduction. Choosingproductionwill enforce CORS origin as configured in api.rest.allowed_origin.
- mode
-
log
- display_level
You can choosefalseortrue. This sets whether or not an event's level is displayed in the log. - level_filter
You can chooseerror,warn,info,debug,trace, oroff. This sets the maximum verbosity level that will be enabled by the log. - db_ttl
You can choose any positive 32-bit integer. This sets how long the logs will be kept in the database in seconds.
- display_level
-
hash
- argon2
- algorithm
You can choose betweenArgon2d,Argon2i, orArgon2id.Argon2idis the recommended argon2 hash algorithm. - version
You can either chooseV0x10orV0x13. It is recommended to useV0x13as it is the latest version and vulnerabilities have been fixed. - salt
This sets salt. The salt length should be between 4-bytes and 64-bytes. The recommended salt length is 16-bytes.
- algorithm
- argon2
-
token
- jwt
- secret
The JWT secret key. - expiry_duration
The expiration duration of JWT token in seconds. You can choose any positive 64-bit integer.
- secret
- jwt
-
mailer
This email configuration is used primarily in admin auth (registration code, reset password code, etc.).- smtp_host
- smtp_username
- smtp_password
- sender_name
- sender_email
-
db
Database backend configuration. Choose one.- postgres
- user
- password
- host
- port
- db_name
- max_connections
- mysql
- user
- password
- host
- port
- db_name
- max_connections
- sqlite
- path
- max_connections
- postgres
-
bucket
- path
Absolute path to store file uploaded by admin or user.
- path
-
api
-
auth
- admin_registration
If set totrue, it will enable admin account registration. If set tofalse, it will disable admin account registration. Note that first-run Hyperbase instance does not have admin accounts, so this must be set totrue. You can set this tofalseafter registering one admin account. - access_token_length
Specify access token length used in auth token for app user signin. - registration_ttl
This sets how long the temporary data of admin account registration will be stored in the database in seconds. After the time has passed, you must repeat from the first step. - reset_password_ttl
This sets how long the temporary data of admin account reset password will be stored in the database in seconds. After the time has passed, you must repeat from the first step.
- admin_registration
Hyperbase UI (Optional)
To run Hyperbase UI, you can run this command.
$ docker run --name hyperbase-ui -p 3000:3000 mnaufalhilmym/hyperbase-ui
Using Docker Compose
You can create a file named compose.yml based on the example below.
version: "3"

services:
  hyperbase-mqtt:
    container_name: hyperbase-mqtt
    image: docker.io/emqx:5
    restart: unless-stopped
    networks:
      - hyperbase-network
    ports:
      - "8883:8883"
      - "1883:1883"
      - "9083:8083"
      - "9084:8084"
      - "18083:18083"
    volumes:
      - ./volume/hyperbase-mqtt/data:/opt/emqx/data:Z

  hyperbase-db-pg:
    container_name: hyperbase-db-pg
    image: docker.io/postgres:16
    restart: unless-stopped
    networks:
      - hyperbase-network
    ports:
      - "5432:5432"
    env_file:
      - config.pg.env
    volumes:
      - ./volume/hyperbase-db-pg:/var/lib/postgresql/data:Z

  hyperbase:
    container_name: hyperbase
    image: docker.io/mnaufalhilmym/hyperbase
    restart: unless-stopped
    networks:
      - hyperbase-network
    ports:
      - "15511:8080"
    volumes:
      - ./config.yml:/app/config.yml:R
      - ./volume/hyperbase-bucket:/app/hyperbase_bucket:Z
    depends_on:
      - hyperbase-mqtt
      - hyperbase-db-pg

  hyperbase-ui:
    container_name: hyperbase-ui
    image: docker.io/mnaufalhilmym/hyperbase-ui
    restart: unless-stopped
    networks:
      - hyperbase-network
    ports:
      - "3000:3000"
    depends_on:
      - hyperbase
To run the Docker compose, execute this command.
$ docker compose up
NOTE: You can also run Docker compose in detached mode (run containers in the background) by using -d or --detach option.
Post-installation
After setting up Hyperbase installation, you can continue to this section.
Configure MQTT (EMQX) security
Hyperbase will subscribe to certain topic specified in the configuration file. Publishers may send sensitive data that should not publicly available. Following the steps below will ensure that the publishers and subscribers will need a username and password to connect to the MQTT broker and the specified topic cannot be subscribed to by other than Hyperbase itself.
-
Open EMQX dashboard.

-
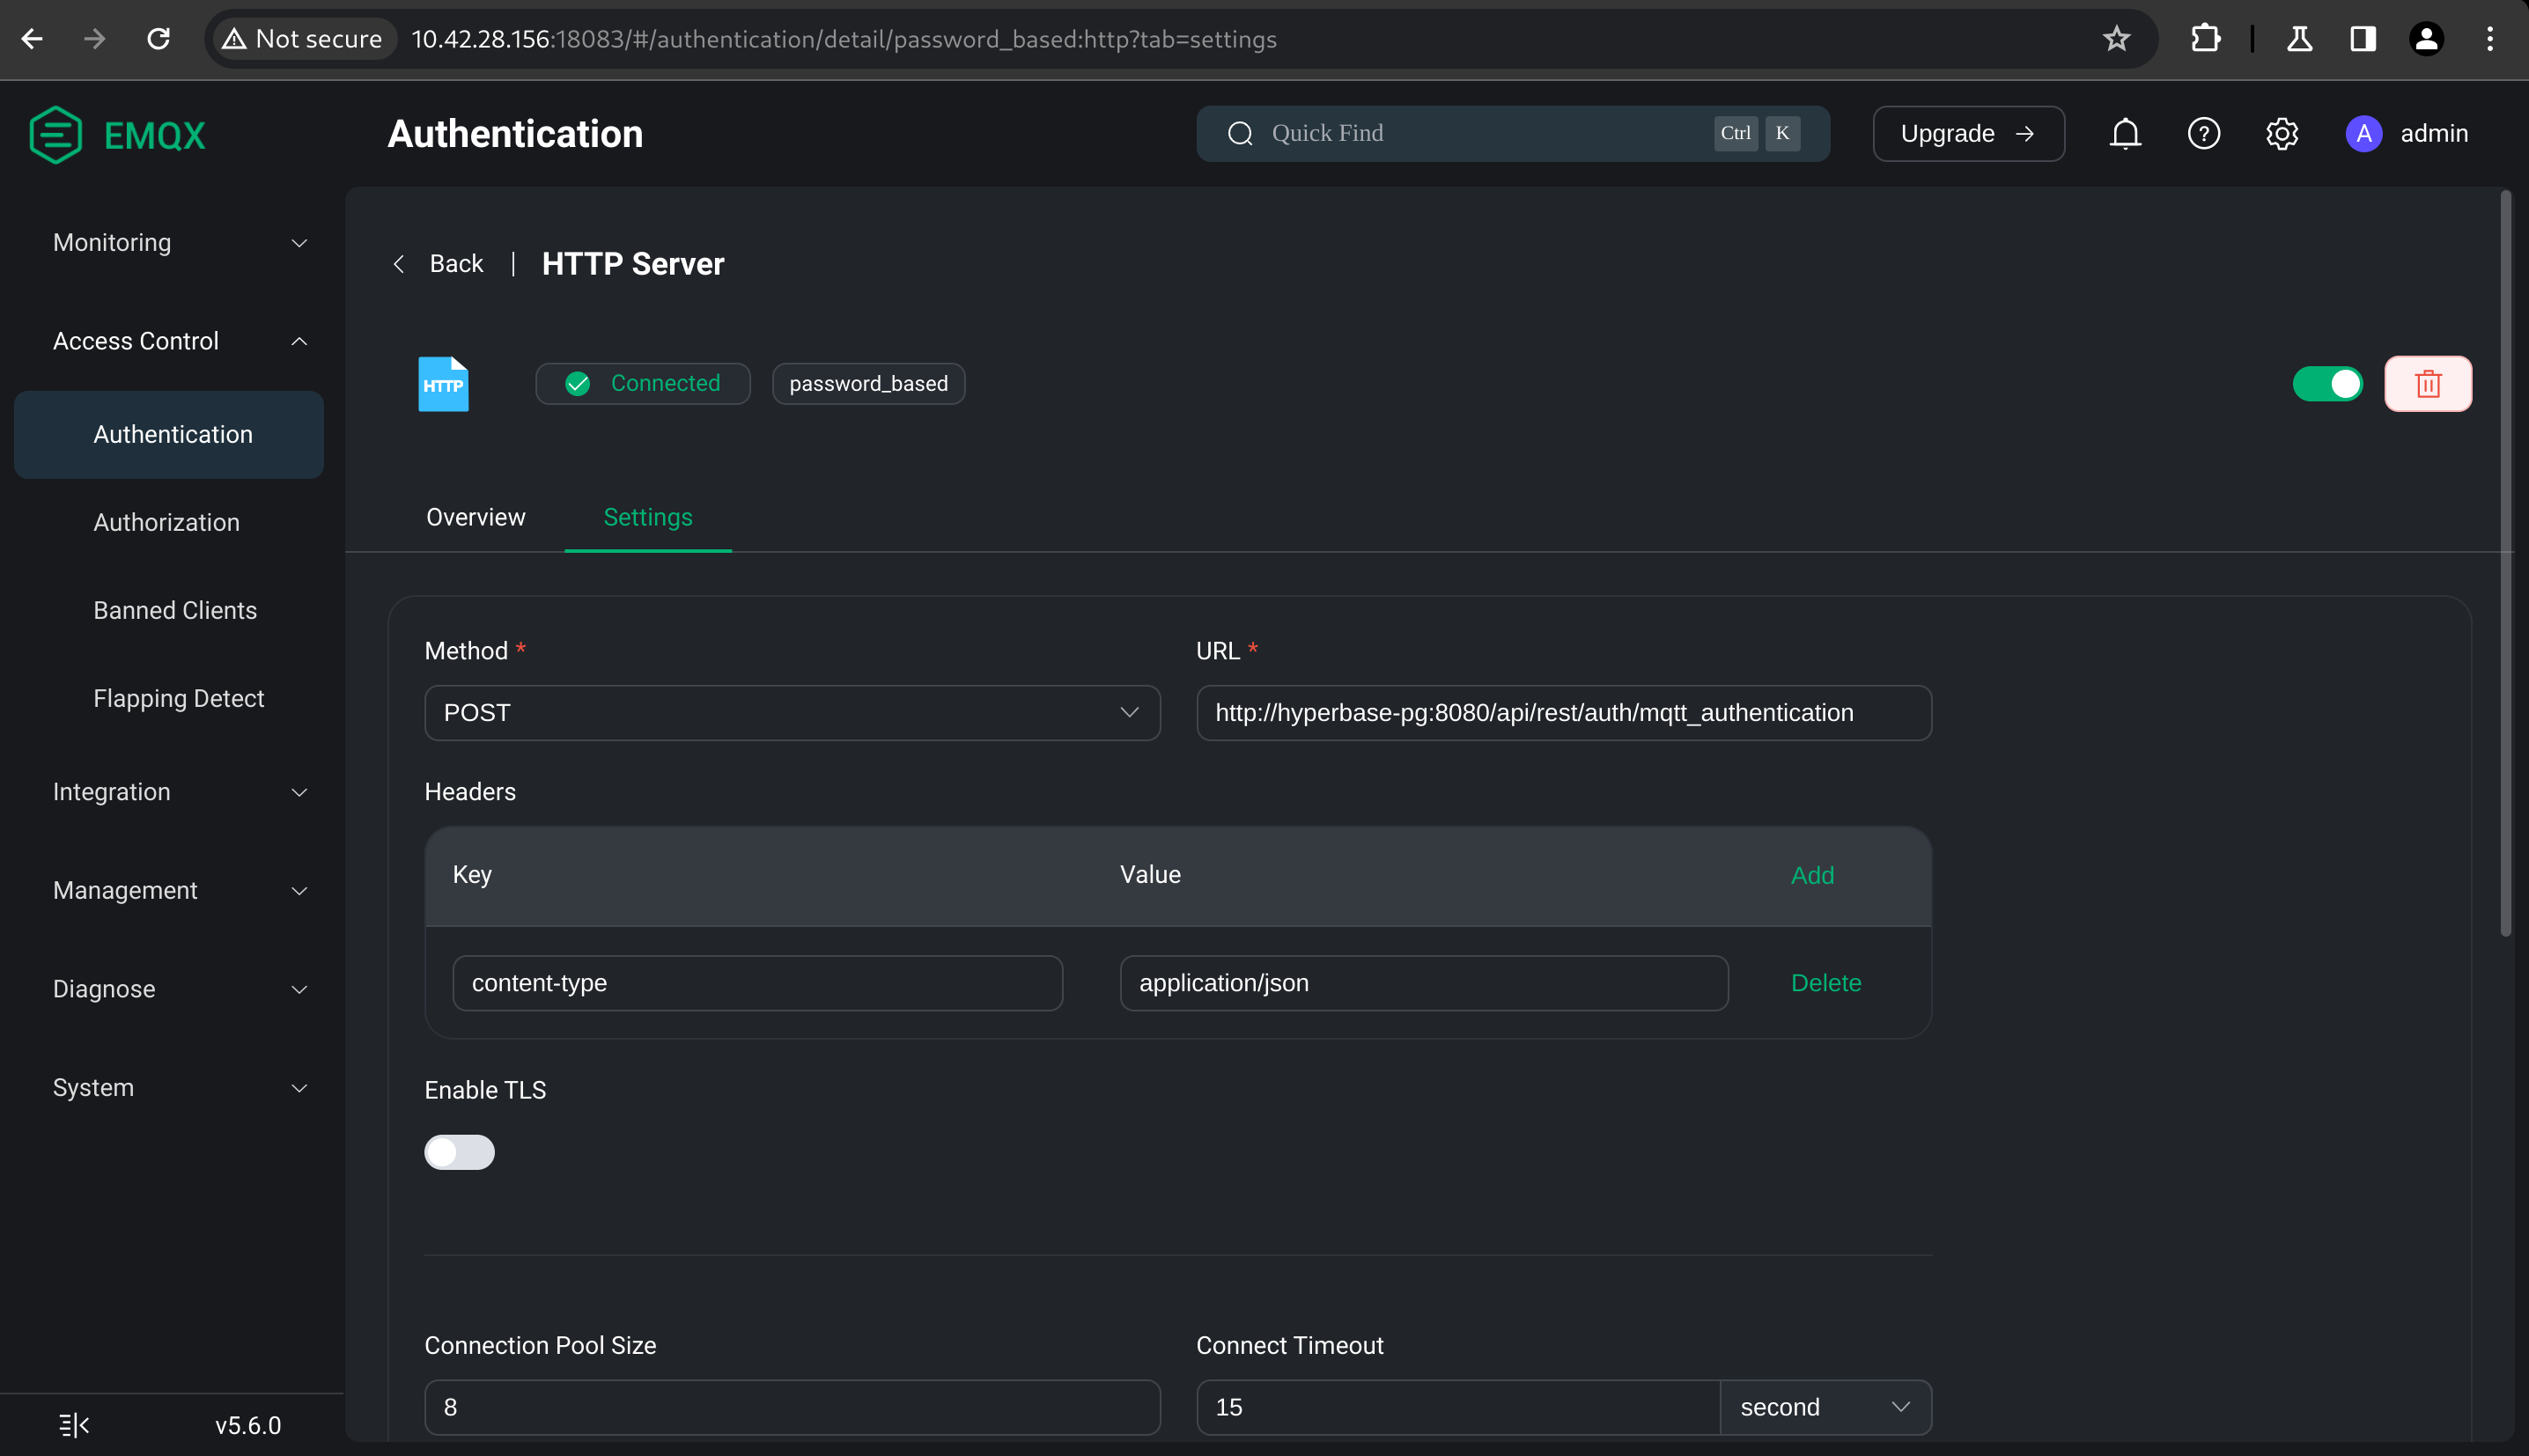
Go to Access Control/Authentication page, then click Create. Create an authentication mechanism with the following properties.
- Mechanism: Password-Based
- Backend: HTTP Server
- Configuration:
- Method: POST
- URL: {{YOUR_HYPERBASE_ADDRESS}}/api/rest/auth/mqtt_authentication
- Headers:
- content-type: application/json
- Enable TLS: {{DEPEND_ON_YOUR_SETUP}}
- Body:
{
  "username": "${username}",
  "password": "${password}"
}
```\
-
Go to Access Control/Authorization page, then click Create. Create an authorization mechanism with the following properties.
- Backend: HTTP Server
- Configuration:
- Method: POST
- URL: {{YOUR_HYPERBASE_ADDRESS}}/api/rest/auth/mqtt_authorization
- Headers:
- content-type: application/json
- Enable TLS: {{DEPEND_ON_YOUR_SETUP}}
- Body:
{
  "action": "${action}",
  "topic": "${topic}",
  "username": "${username}"
}
```\

-
Ensure that the newly created authentication and authorization mechanisms have a Connected status and placed at the top of the list.

Features
On this section, you can learn more information about Hyperbase features.
API
Natively, Hyperbase supports three types of APIs for use in your application. These three APIs have different uses.
REST API
REST API provide all capabilities to access or manipulate the data. To access the data based on rules applied, you can explore the provided REST API hosted on Postman at this link.

WebSocket API
WebSocket is used to listen for updated data on a particular collection. Each successful insert, update, or delete operation will notify each WebSocket listener client.
To listen to a specific collection, you can connect to WebSocket at the path below.
{WebSocketProtocol}://{HyperbaseBaseURL}/api/rest/project/{ProjectID}/collection/{CollectionID}/subscribe?token={AuthToken}
Below is an example.
wss://api.hyperbase.in/api/rest/project/4585def6-b2af-418f-8b31-926bd579b3f5/collection/4585def6-b2af-418f-8b31-926bd579b3f5/subscribe?token=eyJ0eXAiOiJKV1XiLCJhbGciOiJIUzI1NiJ9.eyJpZCa6eyJBaG1paaI6IaSpOgy3M2M4LWUo0gUtNzFiMy1iYjnklTdXYthhY2Q3MKY0ZGJ9LCJleHAiOjwwMjexMDmxNTh9.g4bkzf46RmIuUWYiJ4XI8g-i2c4dyEjb2VZxX2CGxFs
MQTT
MQTT can be used to insert new records to a specific collection by publishing messages with a specific topic to an MQTT broker. Hyperbase server subscribes to the MQTT topic as set in the configuration file. A valid message received by the Hyperbase server will add the record into the collection. The added record will also be broadcast to the WebSocket listener client.
A valid MQTT message has JSON structure as below.
{
    "project_id": "project_id", // replace with your project id
    "token_id": "token_id", // replace with your token id
    "user": { // If using a token set to allow anonymous sign-in, this field becomes optional.
        "collection_id": "collection_id", // id of the collection where the user id exists
        "id": "user_id"
    },
    "collection_id": "target_collection_id", // id of the collection where the data will be inserted
    "data": { // this is an example of the data to be entered
        "field_a": "value_a",
        "field_b": 2,
        "field_c": 3.3,
        "field_d": {
            "sub_field_d": "value"
        }
    }
}
If MQTT authentication and/or authorization is enabled, the MQTT client must pass such authentication and/or authorization before sending valid messages.
Project
Create a project
To create a project, click the circular bordered plus button in the projects page.
List of projects
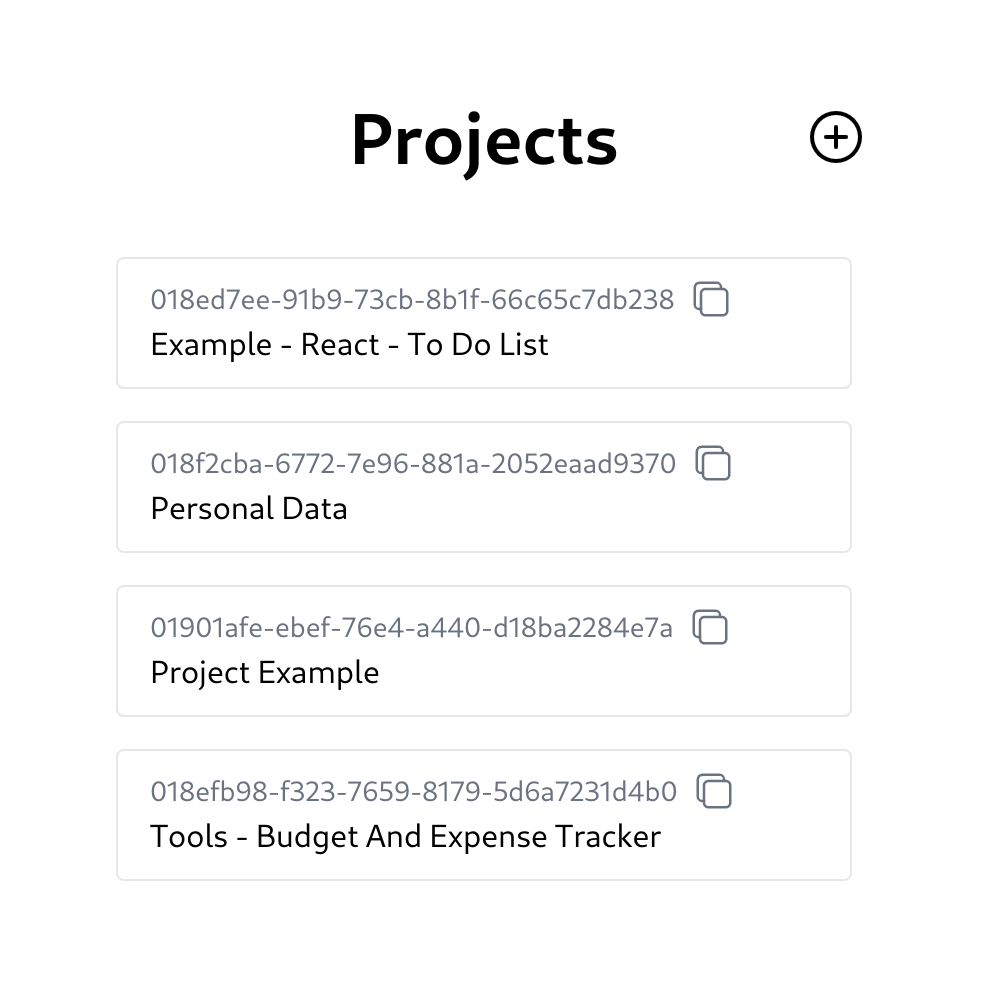
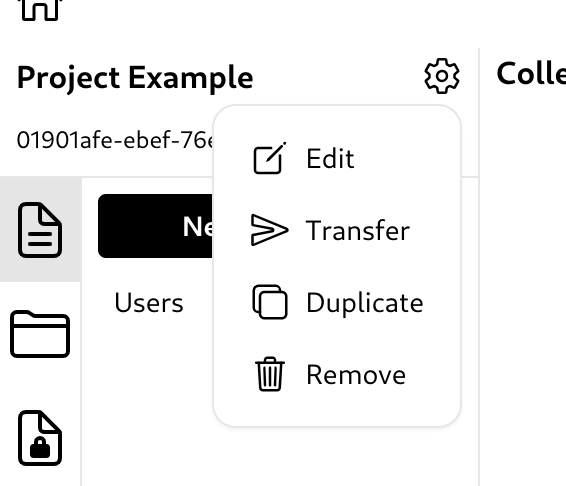
Project option
You can edit the project name, transfer the project to another user, duplicate the project, or remove it.
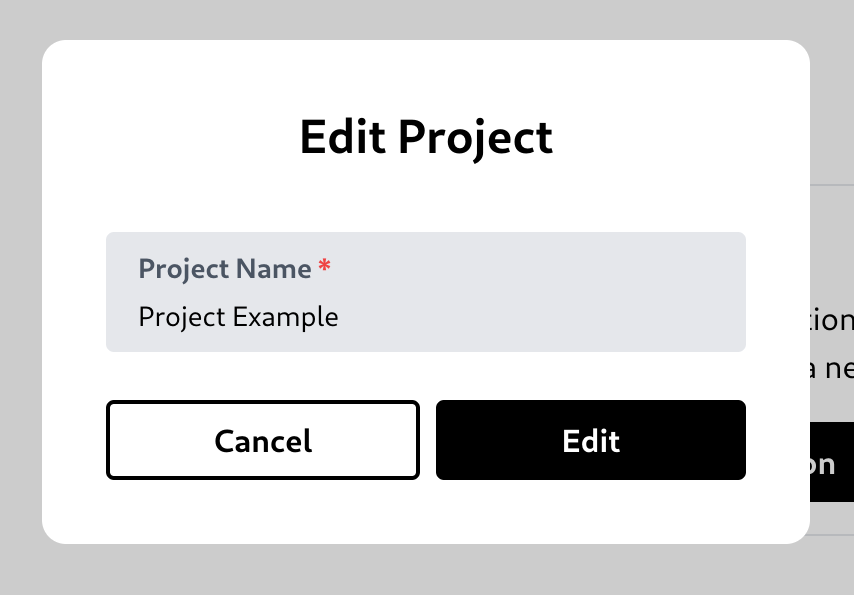
Edit a project
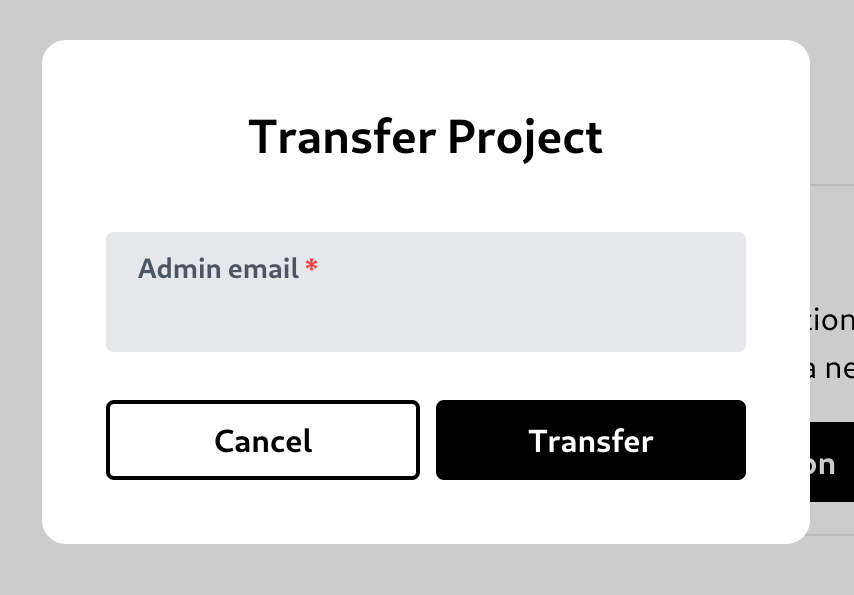
Transfer a project
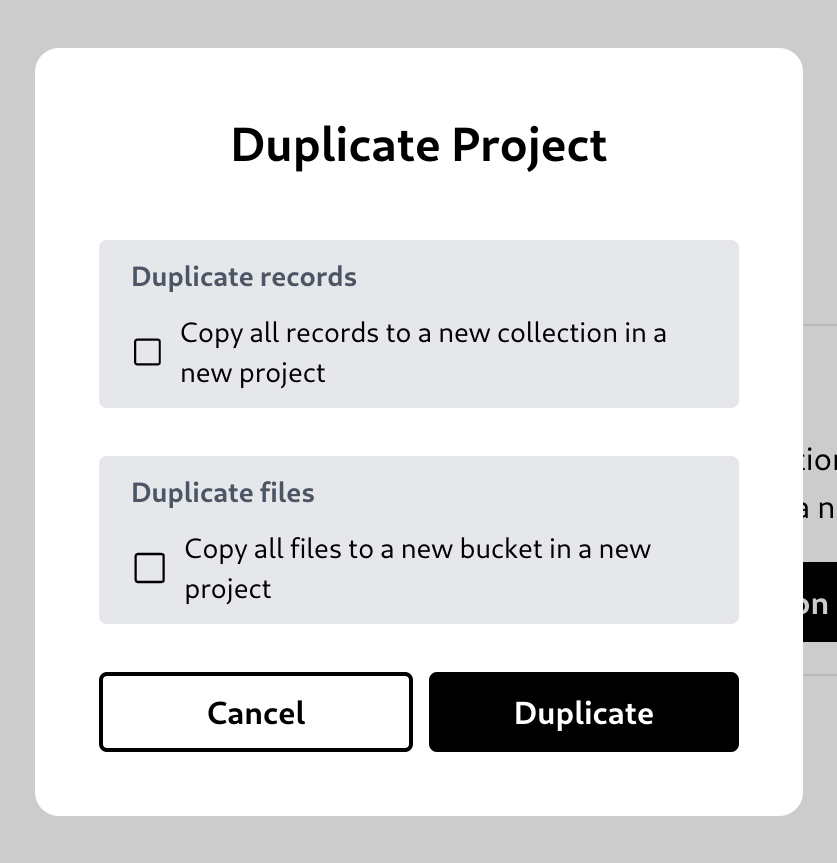
Duplicate a project
You can choose to also copy the data or not.
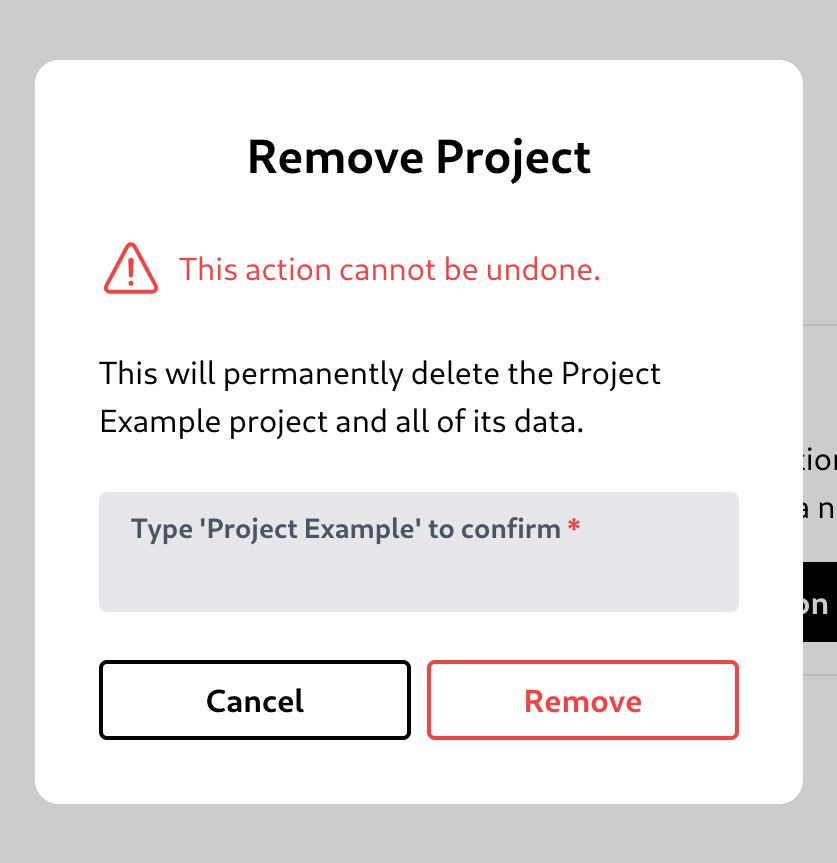
Remove a project
Collection
Create a collection
You can create a collection by clicking 'New Collection' button.

It will open a create collection modal. You can type the collection name, specify the collection schema, choose to allow MQTT publisher client to authenticate using '_id' field on this collection, and a time-to-live (TTL) to set data expiration time.
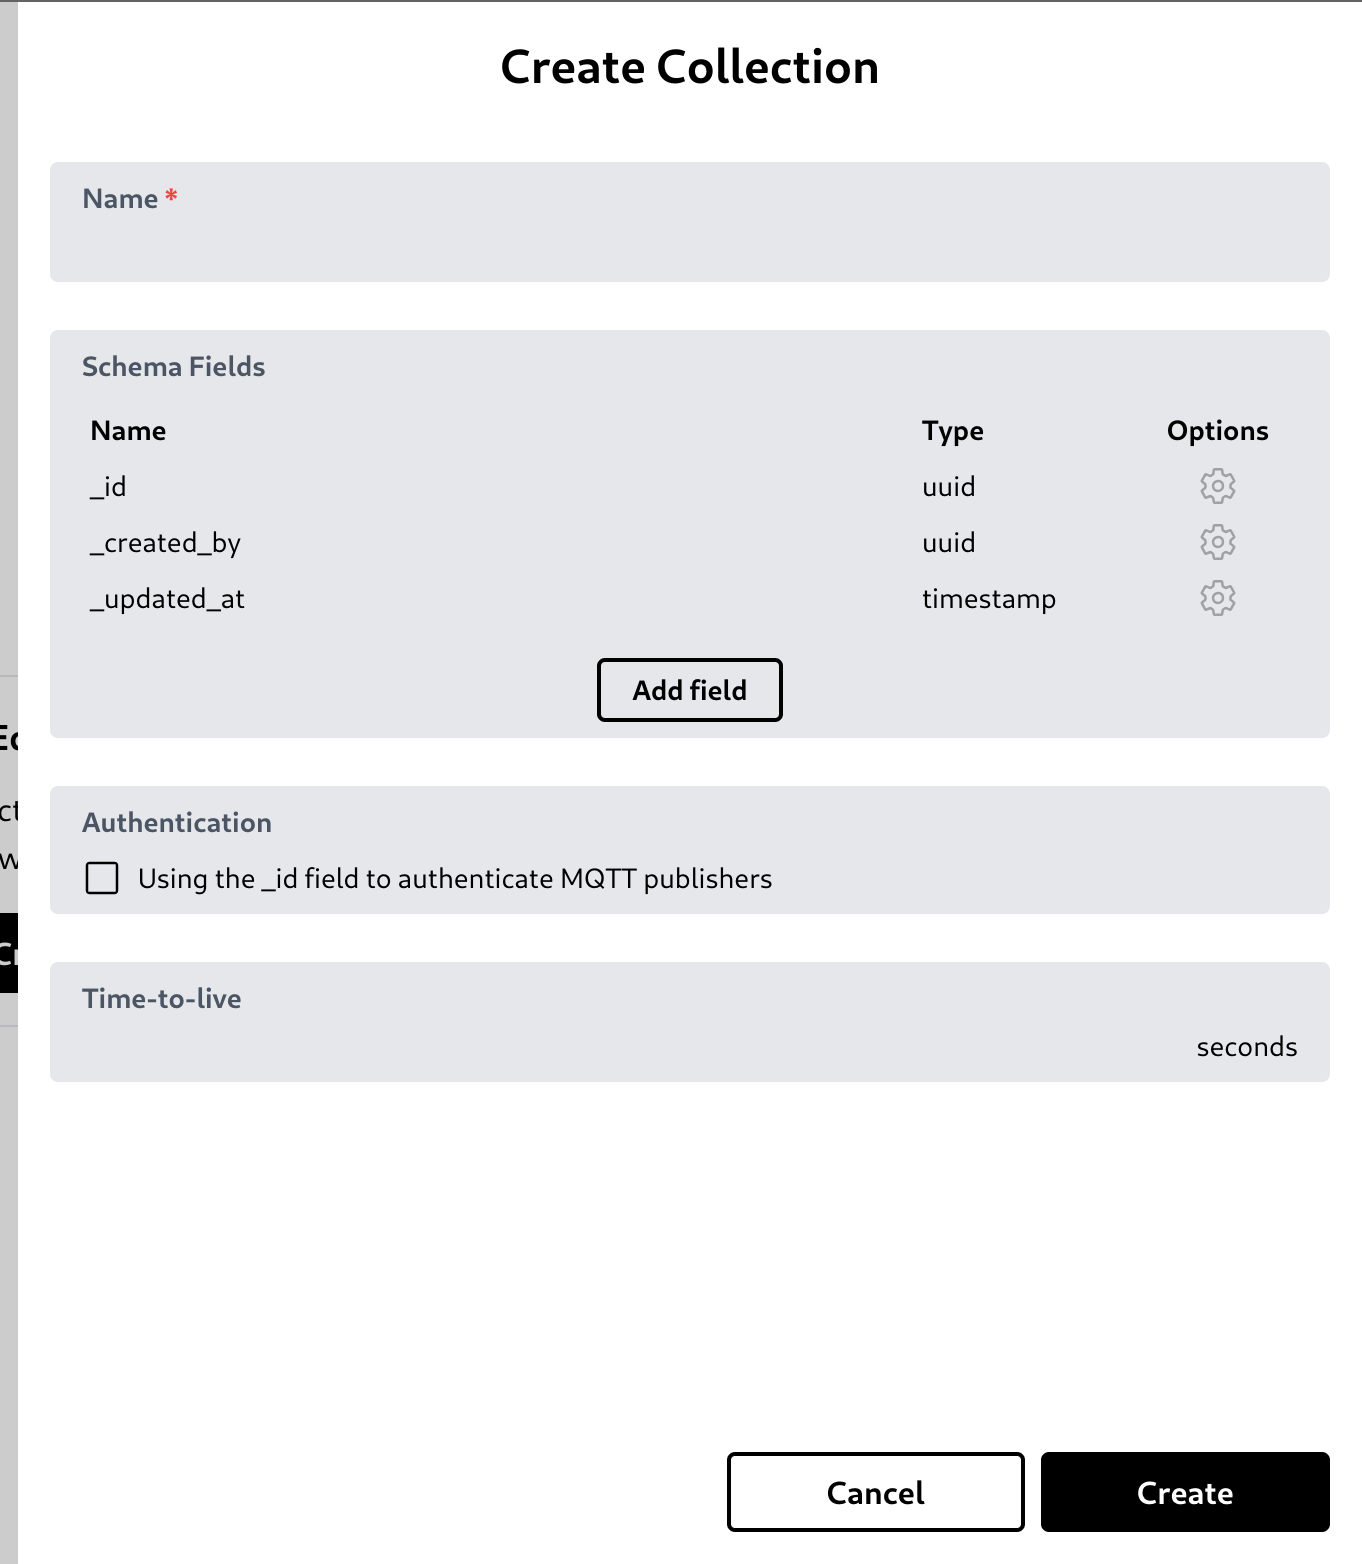
In the schema fields section, you can set the field type and options. More about this collection schema is in the next section.


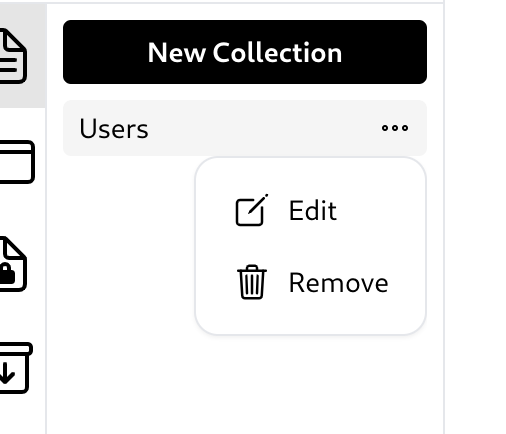
Edit or remove a collection
To edit or delete a collection, simply click the three-dot button and the options to edit or delete the collection will appear.
Collection Schema
Hyperbase is implementing schema-based database. This will ensure that the data to be inserted has the correct field, type, and comply with some rules based on the options applied.
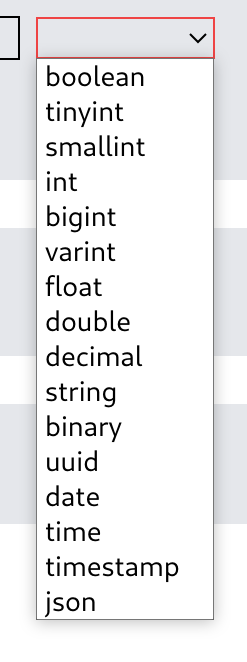
Data Types
Hyperbase supports multiple data types. The data types defined on the schema are then converted to the native types supported by the database used by Hyperbase. Below is the data type equivalence table.
| Hyperbase | ScyllaDB | PostgreSQL | MySQL | SQLite | Rust Type |
|---|---|---|---|---|---|
| Boolean | Boolean | Bool | Bool | Boolean | bool |
| Tinyint | Tinyint | Char | Tinyint | Integer | i8 |
| Smallint | Smallint | Smallint | Smallint | Integer | i16 |
| Int | Int | Integer | Int | Integer | i32 |
| Bigint | Bigint | Bigint | Bigint | Bigint | i64 |
| Varint | Varint | Numeric | Blob | Blob | BigInt (crate: num_bigint) |
| Float | Float | Real | Float | Real | f32 |
| Double | Double | Double Precision | Double | Real | f64 |
| Decimal | Decimal | Numeric | Blob | Blob | BigDecimal (crate: bigdecimal) |
| String | Text | Varchar | Varchar(255) | Text | String |
| Binary | Blob | Bytea | Blob | Blob | Vec |
| UUID | UUID | UUID | Binary(16) | Blob | Uuid (crate: uuid) |
| Date | Date | Date | Date | Date | NaiveDate (crate: chrono) |
| Time | Time | Time | Time | Time | NaiveTime (crate: chrono) |
| Timestamp | Timestamp | Timestamptz(6) | Timestamp(6) | Timestamp | DateTime |
| JSON | Blob | Jsonb | Json | Blob | String |
Field Options
Hyperbase also supports many options to apply to fields. Below is an explanation of those options.
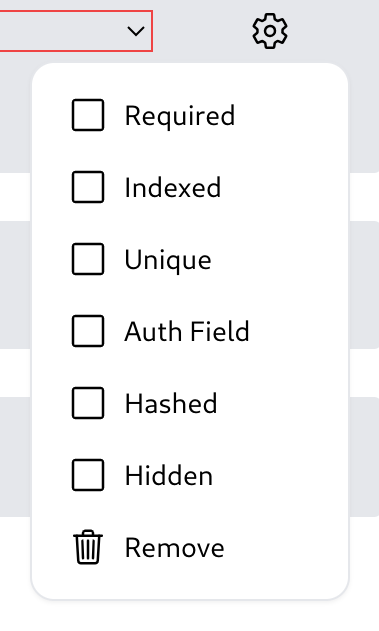
- Required
Data in that field must be not null. - Indexed
Field is indexed in the database. - Unique
Enforce uniqueness for a field within a collection. This means that no two data in the collection can have the same values in the field. - Auth Field
This option marks the field that will be allowed to be used as authentication fields in token-based signin. - Hashed
This option marks the field so that its value will be hashed when inserting and updating data. - Hidden
This option marks the field so that its value will never be sent to users with non-admin credentials.
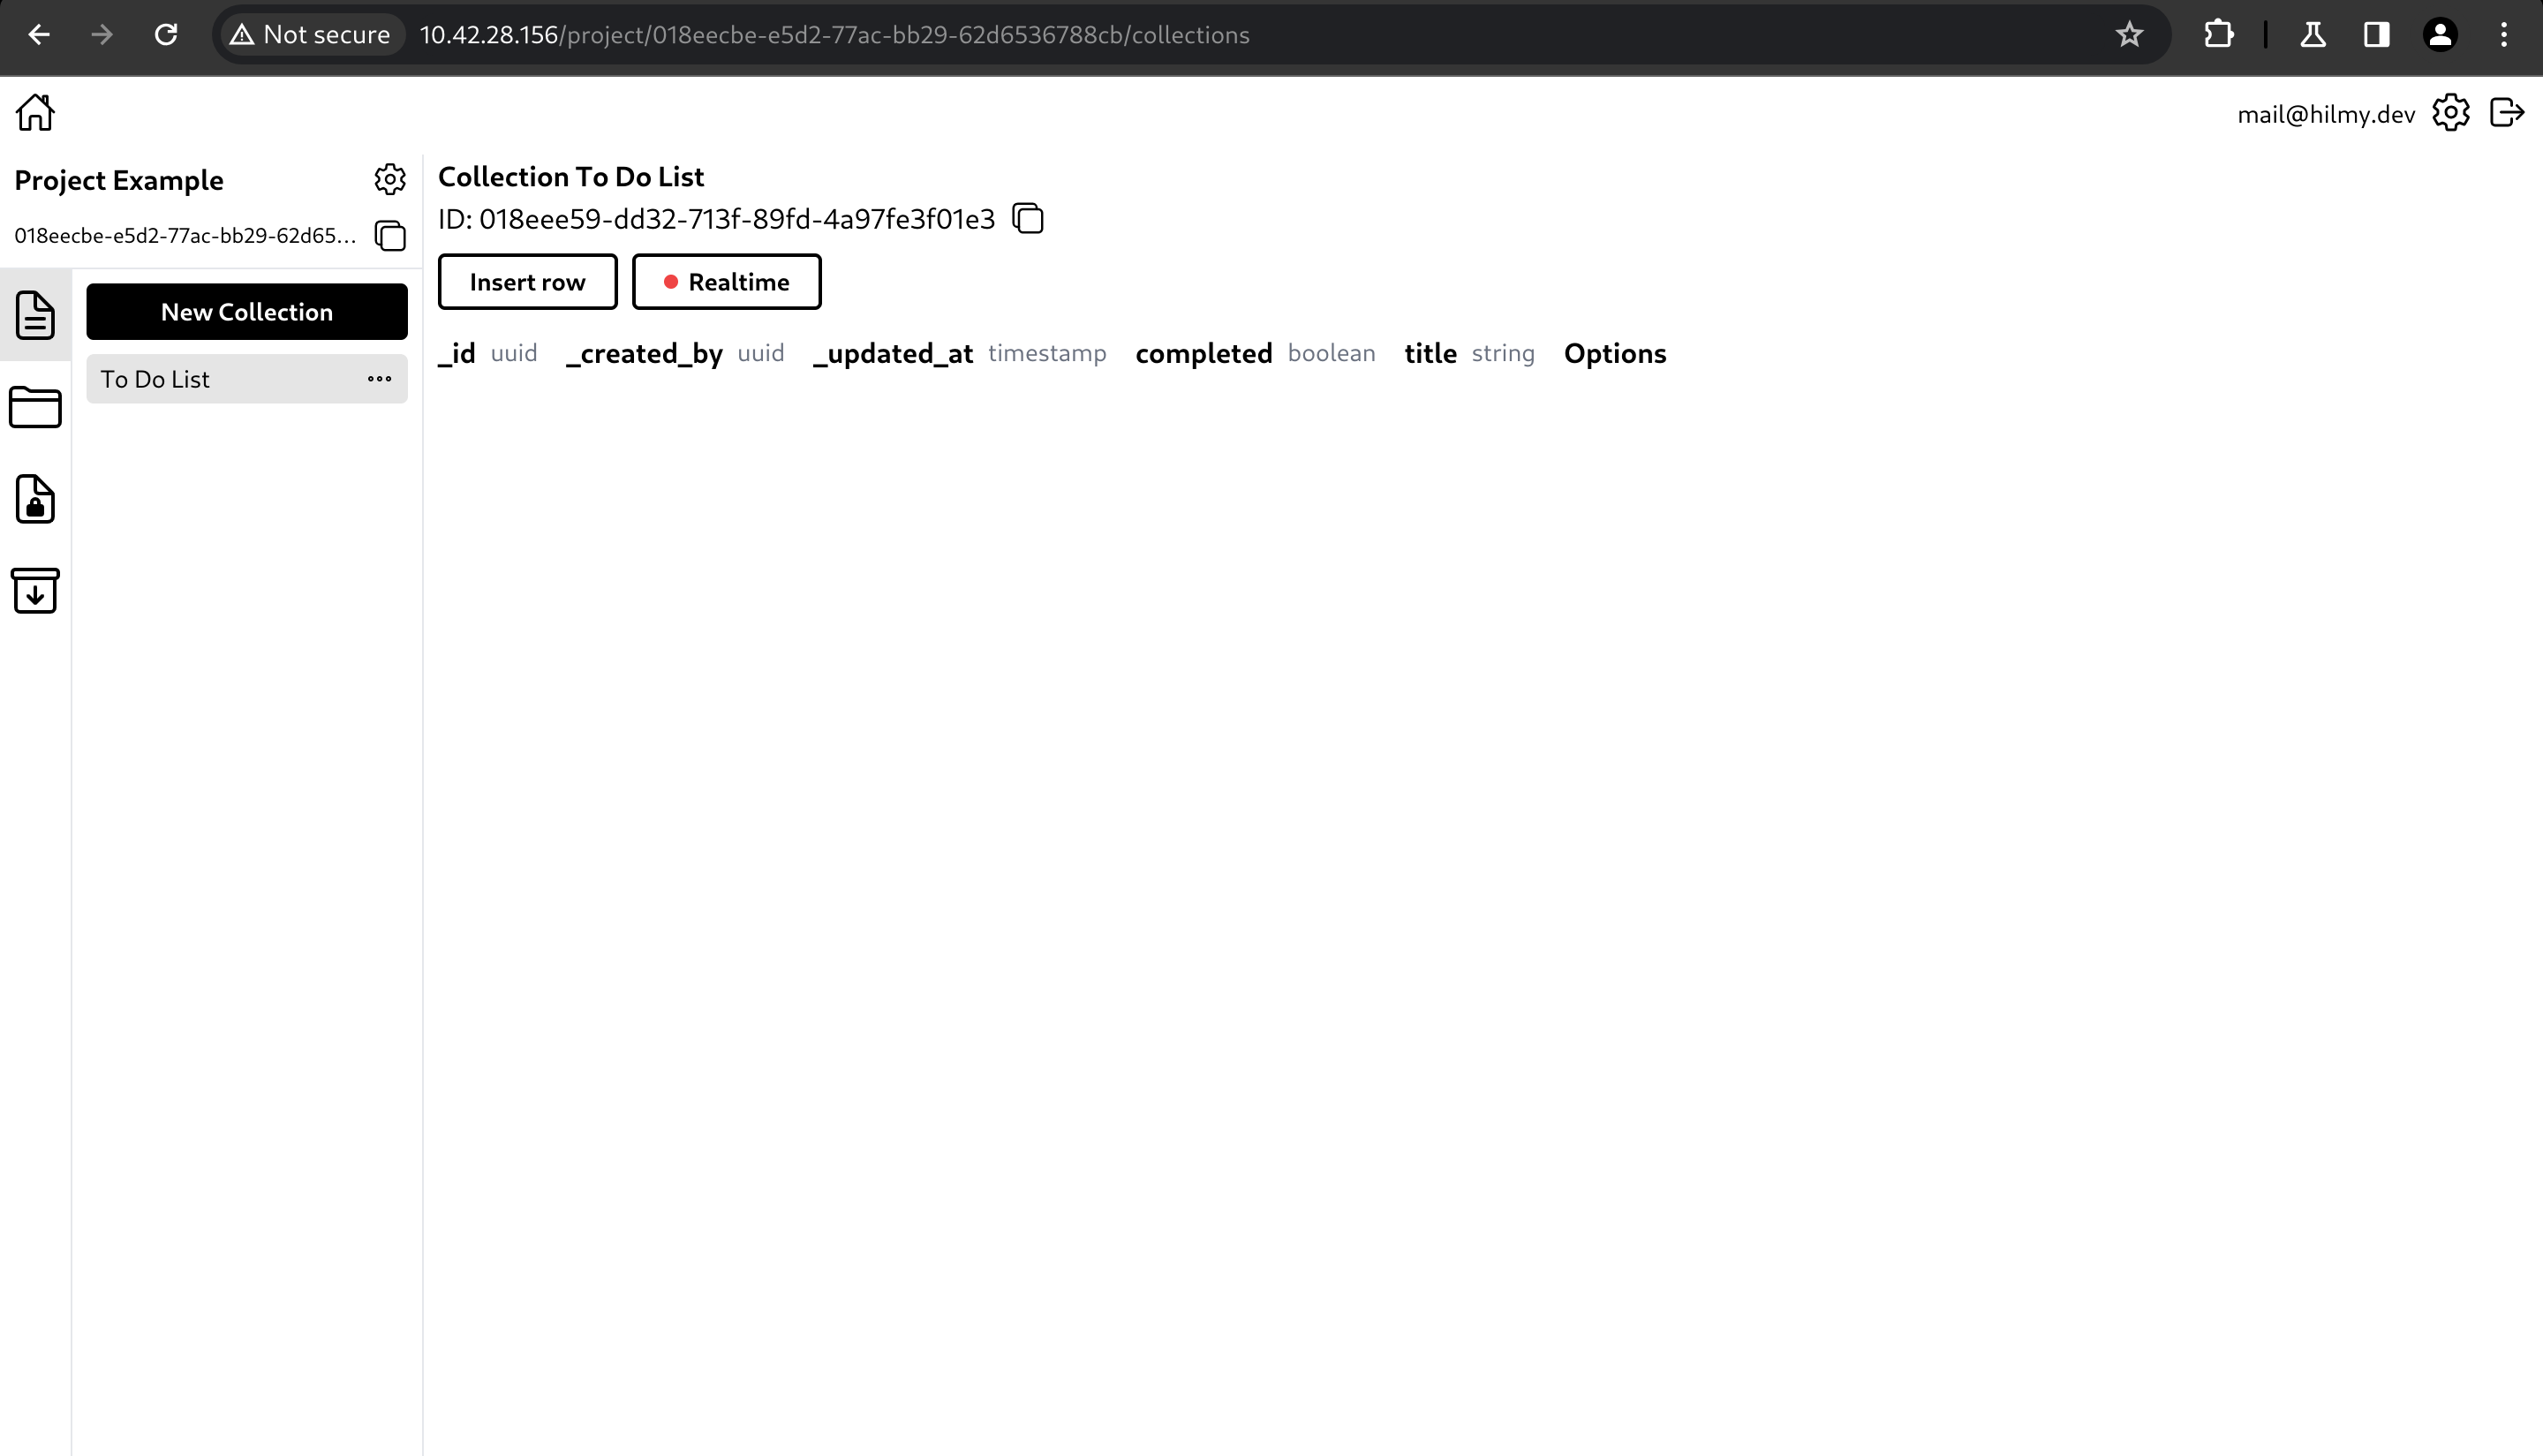
Record
Records are data stored in collections. You can insert, update, or delete records from the UI. You can also enable the realtime feature to get realtime data.

Bucket
Create a bucket
You can create a bucket by clicking 'New Bucket' button.

It will open a create bucket modal. You can type the bucket name and specify a time-to-live (TTL) to set file expiration time.

Edit or remove a bucket
To edit or delete a bucket, simply click the three-dot button and the options to edit or delete the bucket will appear.

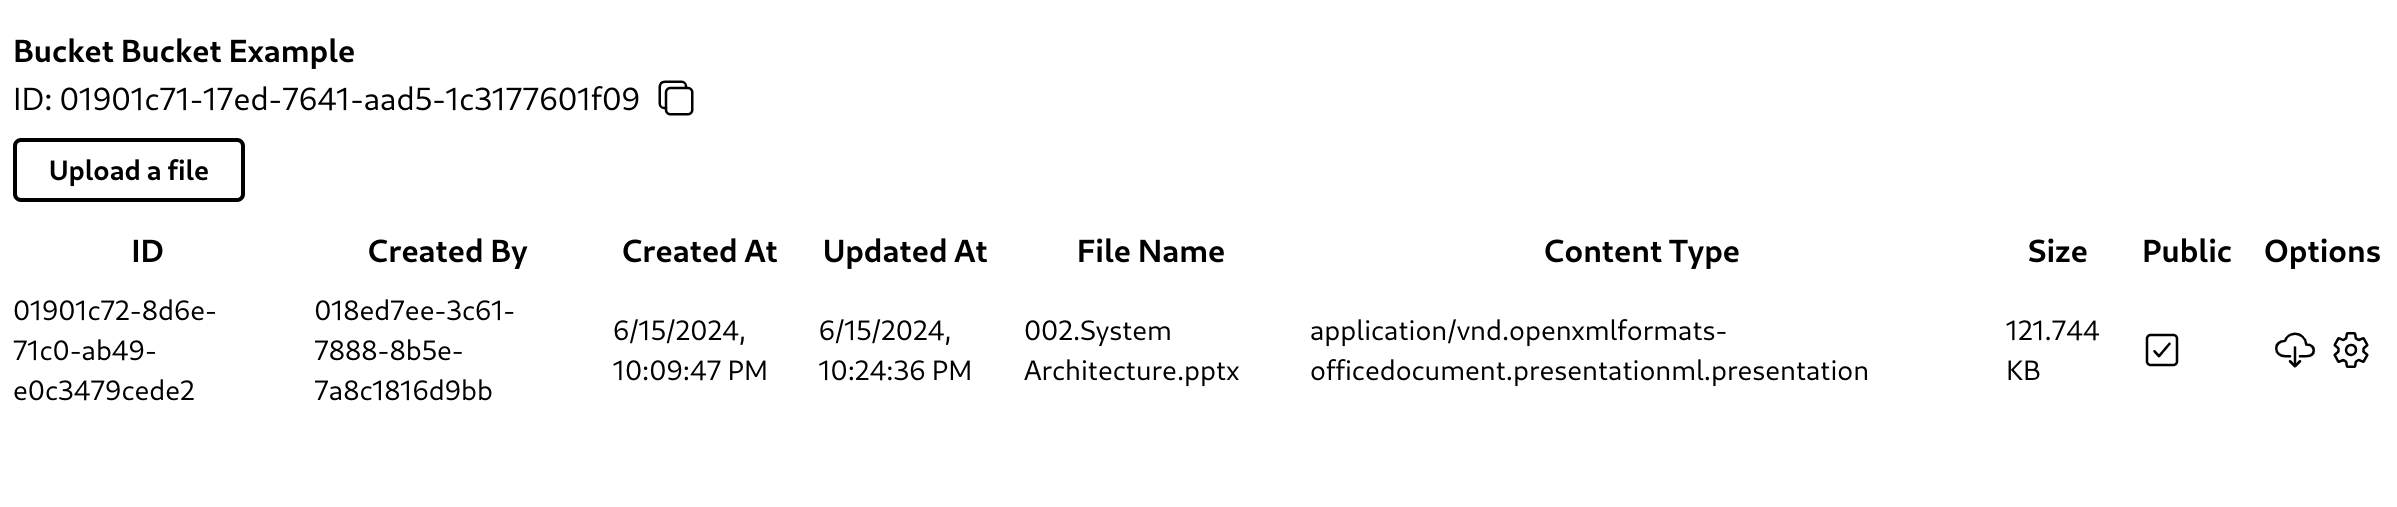
File
After creating a bucket, you can upload, delete, or rename files. You can also set files to be publicly accessible or accessible only to authorized users.
Token
Tokens can be used for signin using token-based signin. Tokens can have a set of rules to allow or disallow access or manipulation of data in a particular collection or bucket. Tokens should be used by application users to limit their capabilities when interacting with Hyperbase.
Create a token
You can create a token by clicking 'New Token' button.
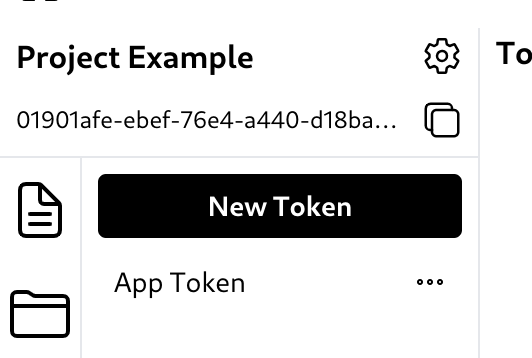
It will open a create token modal. You can type the token name, allow or disallow anonymous signin, or specify its expiration time.
Disallowing anonymous login will ensure the user credentials sent in the login request exactly match a single record with the auth field value specified in the collection option.
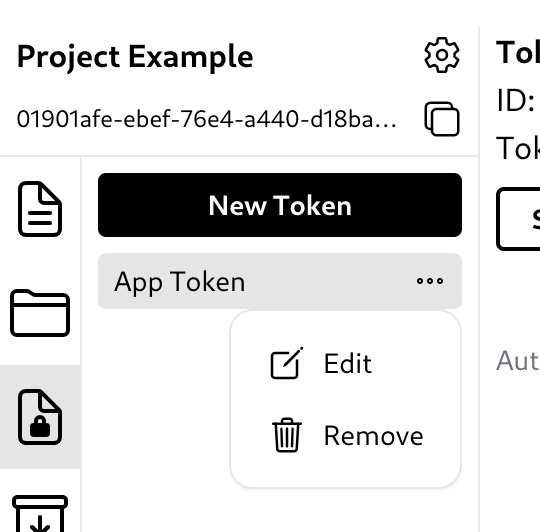
Edit or remove a token
To edit or delete a token, simply click the three-dot button and the options to edit or delete the token will appear.
Token Rules
Token rules are set of rules that manage user access rights. You can insert, update, or delete collection rules or bucket rules.

Find One, Find Many, Update One, and Delete One rules have three options as below.
- All: All signed-in users.
- Self Made: Only user who has created the data, except admin users.
- None: No users, except admin users.
Insert One rule has two options, true or false. True means the signed-in user can insert data to the collection or bucket.
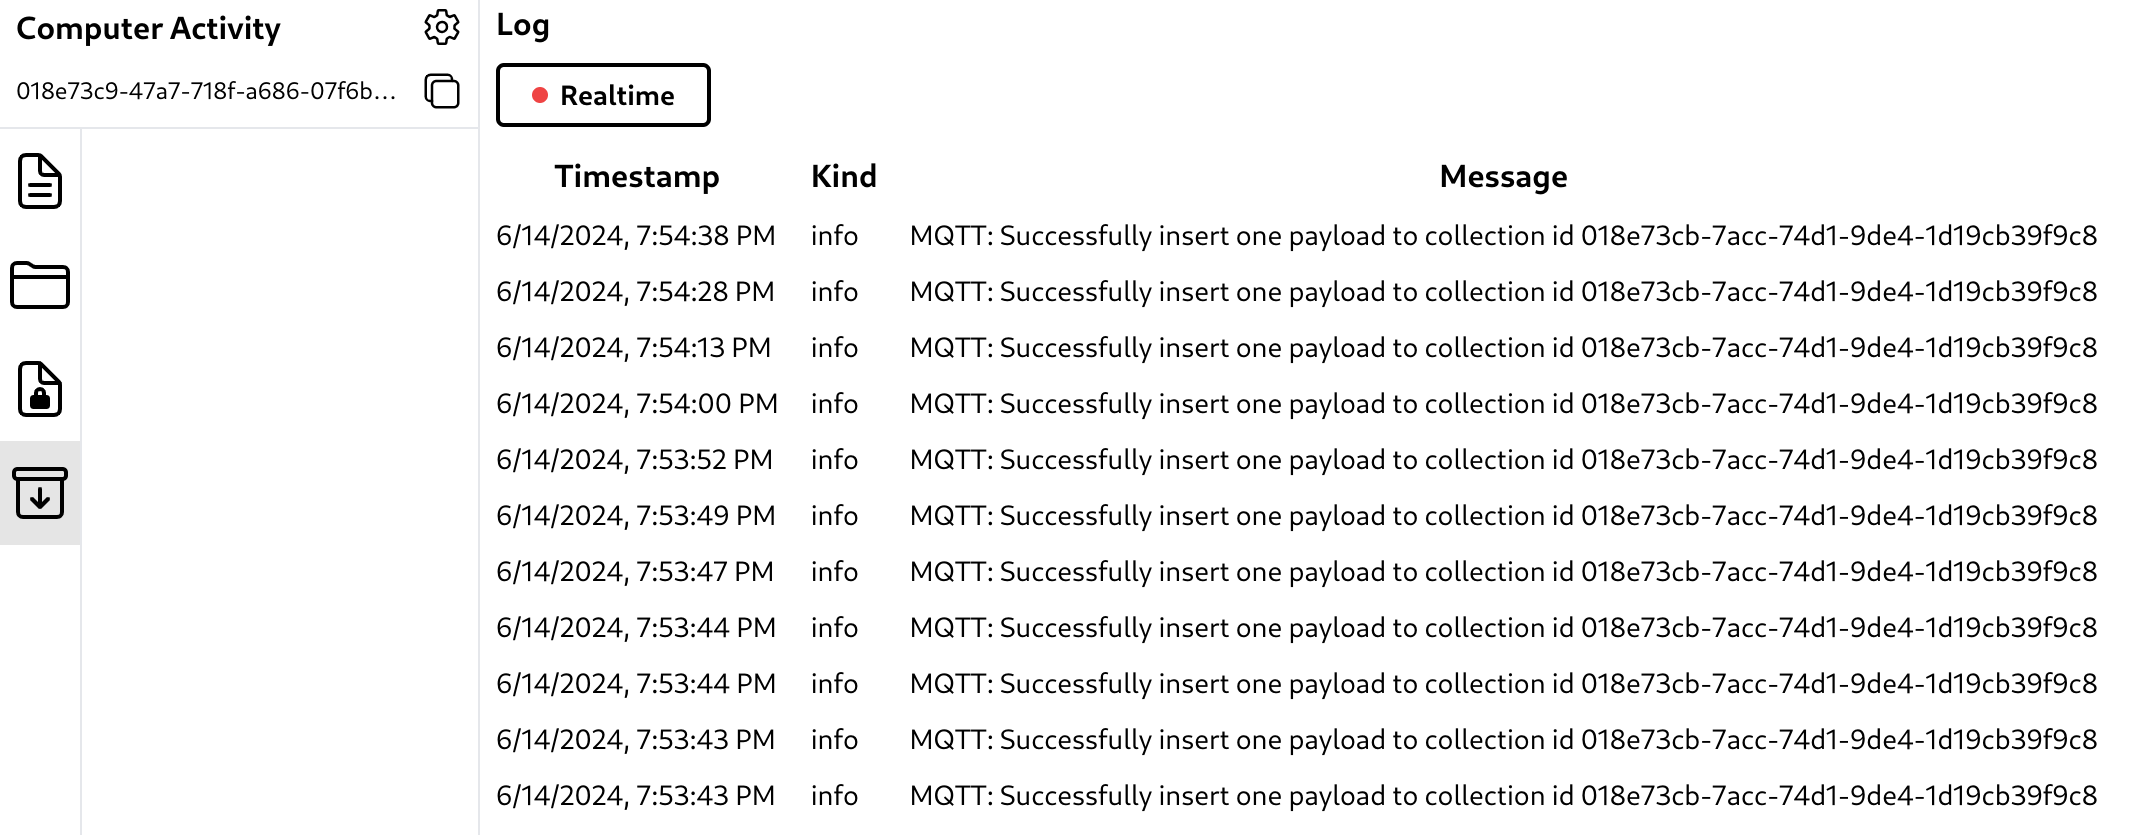
MQTT Log
Finding errors in systems that use the MQTT protocol can be difficult because publishers can successfully publish messages to the MQTT broker but the messages fail to be processed at the subscriber. To overcome this, Hyperbase also provides logs so that admins can monitor errors and the success of data manipulation using the MQTT protocol.
Change Server
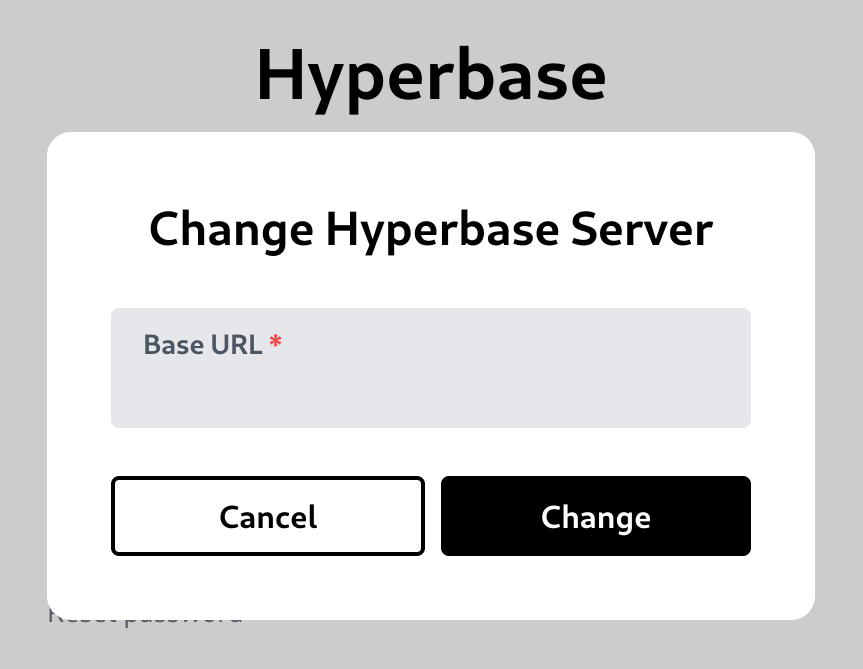
While using the Hyperbase UI, you can change the URL of your Hyperbase server by clicking the gear symbol button on the top right corner.

This will bring up the Change Hyperbase Server modal.

Remove an Account
You can remove your account and data associated with your account by clicking your email in the top right corner. After that, click on 'Remove account' button.

This will bring up the Remove Account modal.
